
by Terry Maynard | Dec 8, 2020 | Review

It’s funny how things come about sometimes. Buying my nice MGB roadster initiated my brother and I looking into all things MG related. Watching the market we identified it was a good time to buy. This MGA popped up in my local market and we bit the bullet and invested in joint ownership of this very cool classic.
Driving… It’s a truck load of MG joy to drive these cars. It really is a joy cruising down the road, very enjoyable. A standard MGA is not a performance car, maybe in its day but not by todays standards. It is more a car that is a delight to drive at a leisurely pace when it is not too hot or not too cold, a fresh morning or evening, a nice mild day time temperature or balmy summers evening, it is terribly English and terribly civilised, simply a delight, an experience to savour like nice food or fine wine.
Interior Space… To get in I slide in under the 14″ after marker steering wheel. I’m 6′ tall. Once in and under the wheel all is good with reasonable legroom and comfort. The steering wheel is close to my chest, it’s comfortable enough though and it doesn’t take long to get used to the driving position. Exiting is a reverse of getting in, I kind of slide back out with gentle assistance from the bracket supporting the windscreen.

The cockpit is quite small with plenty of room for 2 adults but not much else. As there are no window winding mechanisms the space in the doors become stowage room, handy for phones, garage remotes, water bottles, hat, beanie and the like. What I think is really cool is to reach into this space to pull the wire cable that opens the doors.

Space in the footwell is reasonable but the peddles are very close together. Driving in small soft shoes is a must. It didn’t take too long though to work out how to negotiate it, there’s a knack to it that I learned very quickly which I do without thinking now.

Rear stowage… There’s a stowage bag suspended in the rear shelf, very handy and it is designed to stow away the detachable side screens and other small flat items. The one in this car is original factory equipment.
Boot… There’s not a great deal of boot space with the 15″ spare wheel, jack, tools and sundry items.
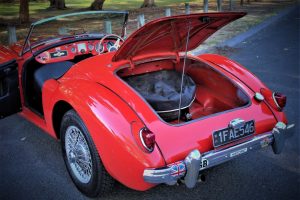
Performance… Well, I think for a car that sold new in 1957, with English engineering much more dated than that, the B series engine having its origins in 1947, it gets through modern traffic quite well. There’s enough get up and boogie in the 1500 twin SU equipped pushrod engine to negotiate traffic and freeway conditions. This car is equipped with an upgraded radiator that keeps it running cool for light general running about and club duties.

Braking… The factory drum brakes on 1500 model cars are a little on the agricultural side. The stopping power of modern cars in traffic and freeway conditions made me quite nervous and got my heart racing. Visions of the precious MGA rear ending a Hyundai or whatever is not a good scenario to be contemplating in the traffic. The options, upgrade to a disc brake system found on the later 1600 model, and/or to install a brake booster system.
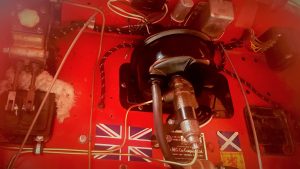
With some research and a chat to the MG repairer, the conclusion was that what many drivers are concerned about is often the “feel” of the brake peddle compared to a modern car. The MGA peddles being so close together, for me makes the whole action of operating the peddles slow and awkward which makes getting used to the “feel” of the old school braking system that little bit harder to adjust to. It was decided to start with installing the after market brake booster with the option to go with discs later if needed.

As it turned out, the booster works fantastically. The brake pedal has a feel and touch more akin to what we are used to in modern cars, I also found the brakes a lot more responsive, to me it seems to speed up the response time, important because of the awkward and close proximity of those peddles. The car readily dives in the front end now, it’s easier to apply the brakes firmly which translates into confidence driving in traffic. Gone are the visions of rear ending a fellow road user with the precious MGA.
The cost in my opinion was very reasonable for the transformation it makes to confidently driving the car in modern traffic. It was a very cheap performance upgrade well worth doing. The MG repairer did a fantastic job of making it a neat and ascetic installation on the plate on the rear shelf in the engine compartment, it can be taken out and returned to factory specs easily and there are no additional and unnecessary holes in the bodywork.

Gear box… The MGA is a 4 speed, the early 1500 model has no synchro in 1st. I’ve found these boxes are quite tight and notchy when in good condition and a bit loose and sloppy when not. There’s not a lot of travel in the lever. There’s no spring loaded return on neutral like modern cars which means going through the gears requires physically moving it through the H pattern gate, for example from 2nd -3rd. Failure to do so will result in the usual protest. Doubling the clutch with a quick 2nd stab makes changes smoother. A gentle and patient pace going the gears rewards the driver with a nice experience which I learned pretty quickly. I love this pic of the 63 years of wear on the gear lever on this car.
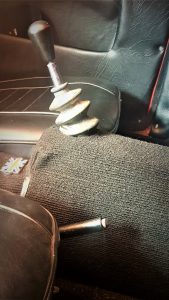 Hand brake… It is said a picture tells a thousand words. Not so in this pic of the hand brake. What it doesn’t show is the way it operates, and I love the way this operates. It was designed for a quick release in an era where running to your car at the start line when weekend racing was common practice. It works opposite to our modern cars. Pulling the lever up and then clicking the button locks in the hand brake, but here’s the cool part, a gentle lift on the lever releases it for a fast release action and the lever falls to the floor.
Now why this is cool is because of the tight and awkward pedal spacing. When stopping in the traffic engaging the hand brake is quick and easy, knock it into neutral, my feet don’t have to fiddle with the awkward pedals, then anticipating when the lights go green I can be in gear, a light lift of the lever releases the handbrake and makes the whole action quick and easy, and I’m moving with the traffic. I’d love to have this in the MGB.

Upkeep… Classic cars though do need care, time, money and periodic repairs as they arise. They generally don’t however clock up a lot of miles so the upkeep is reasonable provided it is done on a regular basis. and insurance cost for this reason is very reasonable, cheaper than my regular car. Rego on club plates is very reasonable too which require membership in a qualifying car club.
So that’s a wrap up on a brief review of owning an MGA.
Happy trails.
by Terry Maynard | Dec 8, 2020 | Refurbish, Repair

To avoid doing this job at all, an alternative would be to buy an MGA, no window glass and its accompanying seals to deal with, otherwise, read on.
The door and window rubber on the GT was in a sorry state, hard and brittle. Time to be replaced, and If that rubber is shot, then so too will the channel rubber that the door glass slides up and down in. Order it at the same time, or if you don’t for whatever reason, (I thought mine were ok till I got a closer look), I got them from a local supplier, it is a very common type and is called “Bailey Channel”, there are 4 sizes, the MGB is the second smallest. It’s available in Australia from good old Clark Rubber, who stock over 100 different car rubbers and seals, otherwise another rubber and seal supplier, or wait another week for an order to arrive from the UK. And do order the gasket between the frame and trim piece. Also, get some non-curing mastic and new rivets from your hardware.
Here is a link to part 1 and part 2 of an excellent YouTube vid on how this is done, very handy. I followed this procedure with only 1 or 2 minor departures.
Part 1….. https://www.youtube.com/watch?v=KE-kIhL_0v8&t=617s
Part 2….. https://www.youtube.com/watch?v=buAh5rLwh74&t=1104s

Follow the steps in the vids, a departure will likely require going back a step to do it again? It is one of those jobs that is a slow and patient process. After completing one door the next will be a lot easier but it still takes time, for example, the quarter window glass is best held in place with its frame and new rubber with clamps overnight. The driver’s door was off the car so I did that one on the bench, the passenger door was done on the car and I found it much easier as the door was held in situ. I won’t describe the procedure step by step as the YouTube vid does that, but I’ll note key points to take notice of.
I soaked all the nuts and bolts in CRC a couple of days prior to starting the job. The 1st two bolts that come out allow the rear side window glass channel to be taken out. Paying attention to how this comes out will be handy for when it has to go back in, which will take some maneuvering to get it lined up and secured again.
I soaked all the nuts and bolts in CRC a couple of days prior to starting the job. The 1st two bolts that come out allow the rear side window glass channel to be taken out. Paying attention to how this comes out will be handy for when it has to go back in, which will take some maneuvering to get it lined up and secured again.
Take note how the 2 attaching points on the window glass rail slip out of its channel, it will be useful for when it goes back in. Fitting the glass back in the door that was still on the car just fell into place easily and was much easier than the door I did on the bench which required me having to hold the door as well as locate the channel. I didn’t replace the rubber in the window class channel, although it was old and brittle, it was not going to budge and come apart so I decided it was best left there. Grease up both rails on this channel before putting it back in.
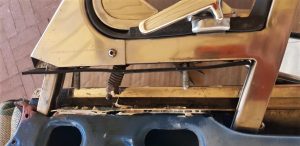
In the video, he didn’t take off the top trim piece that holds the window weather seal rubber which is secured to the door by rivets. This is one of my departures as I found it necessary to take this off for two reasons. Firstly the quarter window frame comes out a lot easier together with this piece, and secondly, the frame goes back on a lot easier with this trim piece held together. It’s because of the odd angle of the bolts and spring tensioner, if that trim is on the door the holes don’t line up when you try to marry the frame to it because of the angles, so hold that trim to the frame and marry these two pieces to the door and it will go back in smoothly. The bonus is you get to clean up the trim piece, polish up the duco under it, put a new bead of non-curing mastic between the door and the trim piece, the new gasket between the frame and trim piece and put it back with nice shiny new rivets. Yippie!
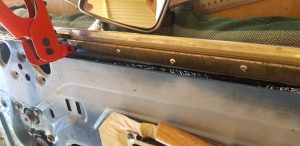
When you put in the new Bailey Channel, notice that the one taken out had a couple of spots of glue. Put a few dots of glue to hold the new Bailey Channel in place. Some months down the track the thought of this sliding down the channel and me having to open it all up again to fix it would not be a good outcome, no sir eeee, gluing it now is a good idea.
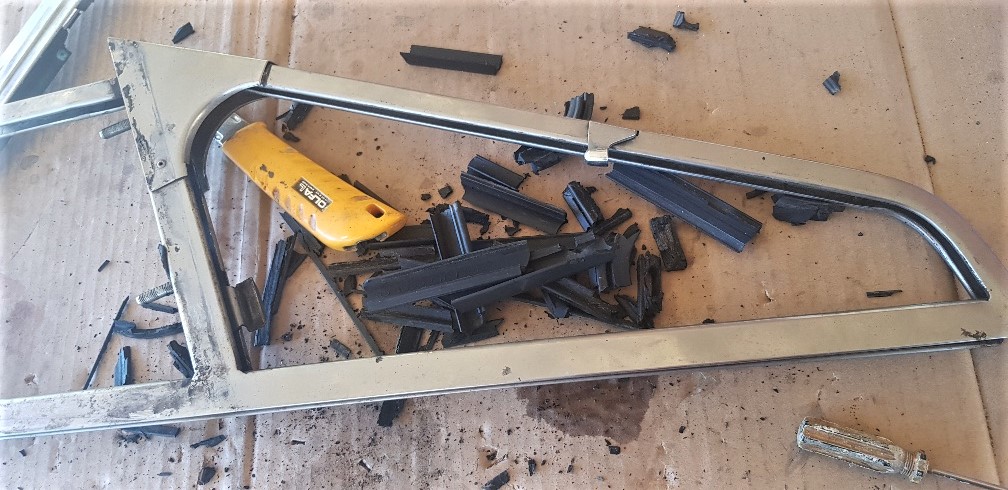
Quarter window rubber weather seal. It’s an ideal time to clean up and polish the frame. When fixing the new rubber, the use of dishwashing detergent readily available from the kitchen acts as a great lubricant to help the new rubber to slide and pop into place, starting at the top of the frame and working your way down. Job done, and it will be gratifying compared to the hard brittle stuff you took out.
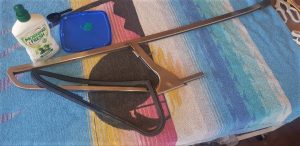
Gently pry apart and separate the quarter window glass from it’s 2 sided frame. Putting it back together I found it best to hold the frame in a vice, try to put the new rubber in the channel and hold it in place as best as you can with pegs or small clamps. Doing the second door I discovered it was easier to firstly jam in the little semicircular chrome piece into its corner, holding it in place so it doesn’t slip out, and slowly marry the glass to all this. Be mindful of the length of rubber, keep trying to stretch it out as you go so it won’t come up short, all the time using the dishwashing detergent as a lubricant. The glass will want to keep sliding and popping it’s way back out, keep working it in and down, when it gets closer to where it needs to be, apply some clamps to press it all the way in. Once it is all the way in I found it best to leave it clamped overnight. The next morning the excess rubber can be trimmed with a sharp blade. Tighten the spring bolt that puts tension on the glass within its frame so it will stay open when driving along and not blow shut.

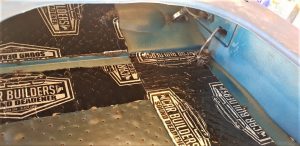
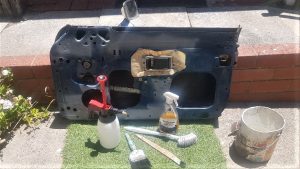
While the door was free of its burdensome parts it is a good opportunity to give it all a thorough clean up inside and out. Some degreaser for greasy parts and orange-based cleaner gets it done. I hit a couple of small surface rust spots with a rust treatment, primed with red oxide, undercoated and touched up the paint with a spray can that was prepared by my local automotive paint store. I took the opportunity to also apply some additional sound deadening, surface cleaned with isopropyl so the self-adhesive strips stick well.
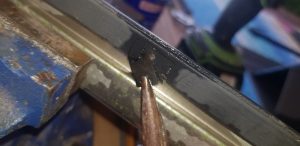
The door glass weatherstrip. A light spray with CRC gives it some slip, gently tap the little spring clips off, I used a jeweller’s screwdriver and a small tack hammer then grabbed with needle-nose pliers.
Put the new weatherstrip on after putting the frame back in but before the glass goes in to trim and align it properly. Putting those little spring clips back on is fiddly, the combination of holding the clip with needle-nose pliers, twisting a flat blade screwdriver to gently get the clip started, and finally, multi-grip pliers to bed it into its right place. Use more dishwashing detergent to lubricate the new weatherstrip so the window glass going up and down as you test it won’t grab.
Putting it all back together I put a dab of copper grease on all the nuts and bolts to make it easier in the event that someone else does this job 40 or 50 years down the track. Ummm, maybe that’s not likely, but who knows.

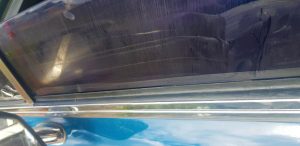
Take the time to oil up the window winding mechanism, all the joints and grease the cog behind the window winding handle inside. And I hope you ordered the top rubber trim that crowns the window glass and frame in all its glory, now is a good time to fit it. (See top picture.)
Happy door window glass rubber and seal replacements(:
by Terry Maynard | Dec 8, 2020 | Carburettors, Refurbish, Repair
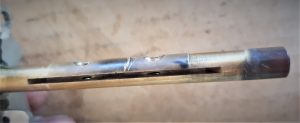
With thanks and credit to Mark for contributing this information, symptoms, diagnosis and solution to fix an air leak around a worn throttle shaft on an SU carburettor.
Those who have been around classic cars and SU carburettors would be familiar with this issue and may have wondered why SU did very little to correct this known problem in their carburettors. Maybe being relatively new to classic SU equipped cars this is a recent development with your own car?

Symptoms:
Attempts to balance the carbs when they appear to be well balanced only to go completely out of balance at the touch of the throttle. Missing, stalling and running rough at idle and driving, or stalling and the car won’t start again.
Diagnose:
With a can of carb cleaner, while the car is idling, spray around the area of the suspected shaft. If an air leak exists the carb cleaner will get sucked into the intake manifold and the car will stall. Problem diagnosed.
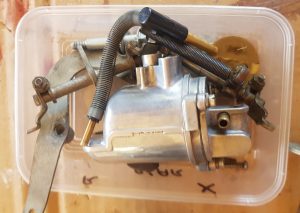
The fix:
Offending carb off the car, it is disassembled and rebuilt involving new oversize bushings, shaft, butterfly valve, seals, gaskets, and the locating holes for the throttle shaft are reamed, a specific glue is applied to the new bushes, it also is an ideal time to clean, inspect and rebuild the carburettor or multiples if that is the case.
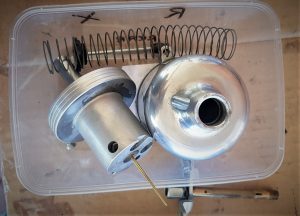
We read about clever people with well-equipped home workshops. They have time on their hands and either knowledge or insatiable desire to get in learn. Furthermore, for the budget-conscious home mechanic, there are savings to be had by learning how to do it yourself.
Alternatively, classic car owners that don’t fit into the above category are left with the option to get someone to do it for them. Car or carbs get delivered to the repair shop and, many dollars later they are refurbished, put back on the car and working as expected, along with a hefty invoice for the privilege.
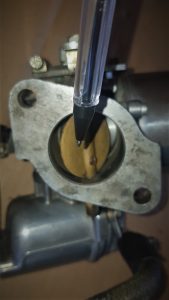
An alternative solution:
This information is the journey Mark embarked on in the pursuit to fix this problem on his own MGB. Additionally, with limited time, tools and technical know-how to rebuild his carbs at home Mark was working to a budget. A “Wanted” listing in our local MGCC chapter yielded a second-hand set of SU’s from me. However, there was some play in the throttle shaft, and we talked about the risk of inheriting the same problem.
Actual Solution:
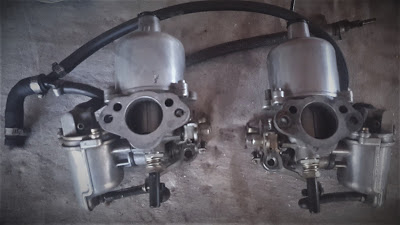
As it turned out after getting his purchase home, inspection revealed that the shaft on this set was worn as well. All was not lost though as the set he got from me were in much better overall condition so further research led him to bite the bullet on attempting a rebuild at home. A visit to an SU repair specialist revealed he didn’t have the tools and skill to hone the body to accept the new shafts or the specific glue to secure the new bushings. The shop offered their services for this part of the job so the correct rebuild kit was sourced, SU H4 AUD325F and R (the F is for Front carb, R would be for rear), identified on the little metal tag usually located on the float chamber. The AUD number identifies the specific model with its unique modifications. As I understand, the many variations usually related to emissions control changes at the time that the MG factory was having to keep abreast of.

Finished job:
The carbs are on the car and running now. Marks original solution was to save time and money buying a set of second-hand carbs. In conclusion, his fix was to rebuild these carbs anyway. His attitude to buying into the second set of carbs with the same problem was to say, “it is what it is”. His search for a solution leads him down a path that yielded him a better overall set of carbs and taught him a new set of skills. It sounds like a win-win to me. Consequently, Mark is better equipped to maintain his own car. He’s very happy with the result.
Happy trails MGer’s….


 Hand brake… It is said a picture tells a thousand words. Not so in this pic of the hand brake. What it doesn’t show is the way it operates, and I love the way this operates. It was designed for a quick release in an era where running to your car at the start line when weekend racing was common practice. It works opposite to our modern cars. Pulling the lever up and then clicking the button locks in the hand brake, but here’s the cool part, a gentle lift on the lever releases it for a fast release action and the lever falls to the floor.


Recent Comments