by Terry Maynard | Dec 23, 2020 | Repair
When I inherited this car the driver door would not close and open properly. The GT has had a rough life and the drivers door had seen abuse of some kind. Closer inspection revealed the door had been messed around with a lot and still wasn’t right, however, I didn’t know how to adjust a door. Importantly, learning how to do this job taught me that a casual approach to adjusting doors and panels will quickly turn into a humbling experience. It is definitely a job to understand properly to have any hope of getting it right unless you get lucky.

Tools:
- A Posi Drive No.4 for the hinge screws.
- Some Alan key bolts to replace these. I took the old screws with me to a local fasteners store who supplied what I needed.
- Low tack masking tape.
- Be prepared to make or improvise for some shims.
- A lot of research and patients.
- Rivets and rivet gun.
- Impact driver.
- 2 decks of playing cards.
- Low tac masking tape.
- Straight edge.
- Feeler gauges.
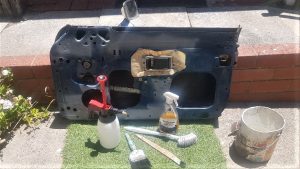
Remove Hinges:
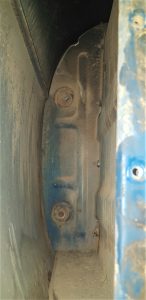
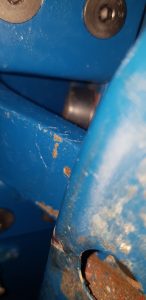
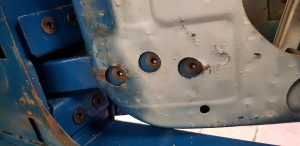
The driver door hinges were worn making my early attempts to adjust the door futile. The first job then is to get them out for inspection. There’s a lot of good tutorials online on how to do this or follow the workshop manual. An impact hammer can help loosen rusted posi screws. Besides the 4 posi screws on the front of the hinge, behind the hinge is a bolt that extends through the A-pillar. The nuts are located in the space behind the splash panel in the front wheel arch. The space between the front quarter panel and the frame is tight to get an arm and socket in there. Additionally, the nuts might be very tight after 50 odd years, give them a generous soaking in a multi-purpose penetrant.
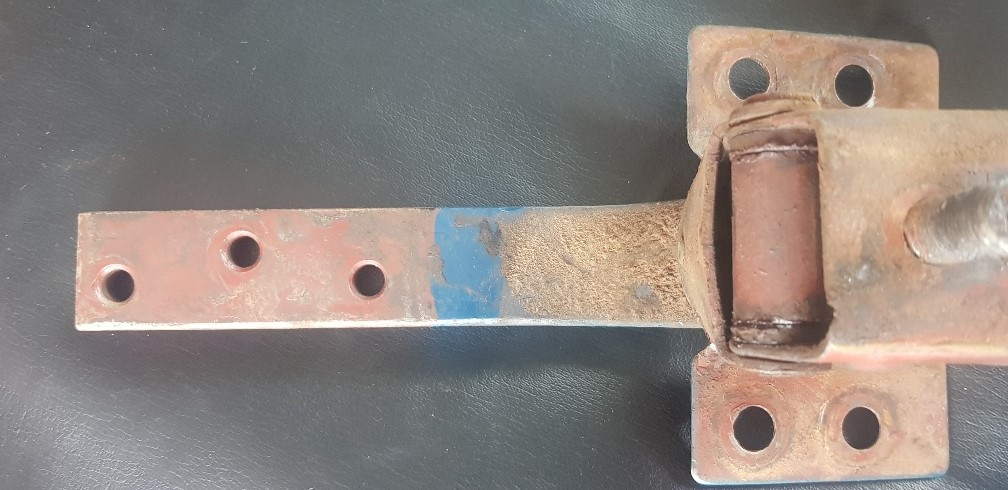
Hinges:
New hinges are available but expensive. Second-hand hinges purchased online might just yield the same problem of worn pins. With an angle grinder, a punch and a hammer, I was able to liberate the pins from the hinges. Yep, definitely worn. I visited a few small local engineering workshops till I found someone willing to fabricate new pins for me. When they were ready to be picked up I was informed the price was a carton of beer. Great, I like the currency.
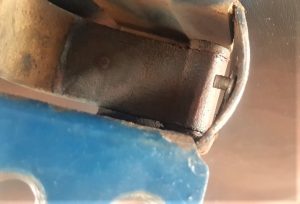
One of the little rubber bumper stops in the hinge was worn and perished, the other was missing. I tracked replacements online, they were very cheap, only a few dollars. In due course, they were riveted on the hinge using a little stainless steel washer for the rivet to grip onto.
Door Alignment:
I found a very good tutorial on how to approach fitting doors. Importantly, following this procedure will get the job done. The number one most important thing is to familiarize yourself with the way it all works. This actually takes attempting to adjust the door and failing at it several times. Failure leads to research, a better understanding of the process, and eventually success. (Life hack tip included at no extra cost.)
Ok, so after being humbled a few times I was now ready to follow a procedure. Who would have known the skills of a panel beater are technical, they work to specifications and tolerances. For instance, if panels and welding and such is not done to specifications, aligning doors and panels is made difficult.
1. The original posi screws can be used to start the adjusting process. If you decided to purchase replacements they can be swapped out later. Alternatively, the new screws can be used first. As a starting point, semi-tighten the hinges in the A-pillar as high and as far outboard as possible. Leave the nut behind the splash panels for now.
2. Semi-tighten the door to the hinge arms. A second person or a milk crate offer good support to the door. Remove the striker plate from the B pillar.
3. Protect the paint from the door and front fender from fouling each other when adjusting the door. Run some low tac masking tape along the leading edge of the door and back edge of the front panel. Close the door slowly and check the door and panels don’t kiss.
4. As a starting point, place 2 stacks of 30 playing cards each on the door sill. One each towards the A and B pillars. You will add and take away cards from these packs adjusting the height and gap. Additionally, note the number of cards for future reference.
5. Adjust the fore and aft position to get even gaps to the front and rear fenders.
6. Using your eye and a straight edge, adjust the height. Add or take away playing cards and keep evaluating. Repeat till you’re satisfied with the gaps all around the door.
7. When you think you have it, tighten the hinge and door screws.
8. Remove the playing cards and check the door again slowly. At the B pillar, the door may drop slightly. Estimate how many playing cards to add, close the door, loosen the hinge, open the door slightly to add the cards, tighten the hinge again and evaluate. Repeat till you think you’ve got it.
9. Take note of the number of playing cards at each end.
So the height and gap are ultimately locked in, now to the next phase.
10. The leading edge of the door is controlled by the front hinges. Supposedly, the door is proud of the fender a bit, remember you mounted the hinges as far outboard as they could go. Back off the hinge mounting screws a bit, close the door, now press the forward edge into the car until it’s flush with the fender. Carefully open the door, and tighten up the hinges. Repeat until it is satisfactory. Do each hinge separately, ideally, get the top of the door flush by adjusting the top hinge first, and the bottom of the door with the bottom hinge.
Note: If the car has had panel work done in the past, it’s possible the available adjustments won’t get the door to where it needs to be. This is where you need to get creative with shims and alternative methods to get it right.
Example 1: the door may not come out to the fender, even with the hinge adjusted as far outboard as it will go. The fix is to measure the adjustment needed using a straight-edge and feeler gauges, and then make a shim up out of sheet metal just a bit thicker than needed. The shim needs to be roughly the size/length of the portion of the hinge arm that’s inside the door, with holes to allow the hinge/door bolts to pass through. The shim then goes between the outside face of the hinge arm and the door – effectively moving the door farther outside of the hinge position.
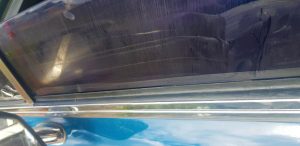
Example 2: The first time I finished following these steps, there was a 30mm + gap between the driver’s door frame and the top of the window glass while wound up. It clearly wasn’t going to seal against the door rubber properly when closed and needed to be done again. Additionally, the bottom of the door didn’t come out to the sill although the hinge was as far outboard as it would go.
My solution required two steps. Firstly, I fabricated a shim for the bottom hinge to push the bottom out and at the same time tilt the top in. Secondly, I checked and made adjustments at the bottom of the window rails inside the door, effectively pushing the bottom of the glass out that tilted the top of the glass in. These two steps combined to bring the top of the glass closer to the frame by about 10 mm, now it will seal properly with the door rubber. On my car, there is evidence of previous repairs or damage to either the sill, door, front fender, or all 3.
Example 3: What if the hinge is mounted as far inboard as possible and the door is still proud of the fender. Using the straight edge and feeler gauges again, measure the gap. This is the amount of material that has to be removed from the hinge arm. There’s plenty of thickness on the hinges to accommodate this creative fix.
Importantly, decisions need to be made about what is tolerable based on the goals of the project. For example, my car is not going to be a showpiece, my goal is to refurbish and work with what I have. I was satisfied with this second attempt even though the bottom of the trailing edge of the door still sits slightly inboard of the sill. It is a vast improvement from what I started with. However, decisions made about panel gap and alignment on a comprehensive restoration project are going to be very different to my project.
Striker plate:
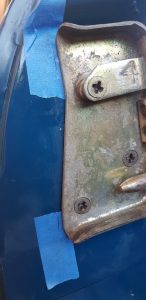
11. Finally, mount the striker plate loosely to the B pillar. It moves backwards/forwards (horizontal), up/down (vertical), and rotates a little. Note, partway through this phase I realised the striker plate needed to be shimmed out just a bit so it would align with the door latch cleanly. Follow these steps. Firstly, line it up vertically by slowly closing the door with your eyes at latch level, moving the striker plate up/down and rotating it so that the bottom of the latch on the door just clears the striker plate, and the latch engages the striker cleanly. Tighten the screws. Evaluate and repeat as needed. That aligns the striker plate vertically, up/down.
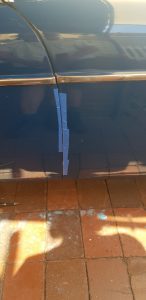
12. Secondly, now align the striker plate horizontally in/out from the centerline of the car so that the trailing edge of the door is flush with the rear quarter panel. On the B pillar, using low tack masking tape, put a strip just above and below the plate vertically, and 2 strips on horizontal top and bottom. With a fine point marker, put reference marks on the tape so that the horizontal in/out movement of the plate can be made even while maintaining the vertical up/down position (you don’t want to change the vertical position of the plate, since you’ve got that set, and you don’t want to rotate the plate either). Close the door, evaluate the trailing edge of the door with the rear quarter panel for ‘flushness’. Ideally, measure it if you’re close with a straight edge and feeler gauges. Now open the door, loosen the striker plate screws a bit, and move the plate in or out the corresponding amount. I did this by eye with incremental adjustments of the striker plate using my reference marks to maintain the vertical position of the plate. Tighten up the screws, close the door, and reevaluate. Repeat as necessary.
You’re finished:
If you are going to replace the posi drive screws with alternatives, now they can be swapped out one at a time.
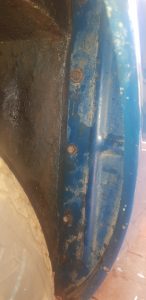
When the job is done, tighten up the hinge bolts inside the splash panel. After that, it’s an opportunity to clean up and apply anti-corrosion treatment before putting the splash panels back on.
If the doors are not coming off again, you’re done. YIPPEE. However, if the doors need to come off for whatever reason, for panel and paint for example, follow this step. Drill 2 locating holes of 3mm into the striker plate and hinges. Corresponding size pieces of rod in the holes then become locating pins for when the doors go back on.
This trick works for boot and bonnet hinges as well. Finally, it is best to do the adjustments before the panel and paint. All that messing around after painting will mess it up, not good!
Happy door and panel trails 🙂
by Terry Maynard | Dec 13, 2020 | Refurbish, Repair
Bent Hinges:
When the GT was towed home it got loaded backwards on the flatbed truck. The rear quarter window latches were not connected. At freeway speeds, the windows wanted to blow open which caused the hinges to stretch. Fortunately, the driver noticed and stopped to secure them but not before the hinges got bent out of shape a bit. The windows wouldn’t close into the frame anymore. The solution was to take them out and reshape the hinges This was a delicate job to do without breaking the rivets holding the hinge to the window.
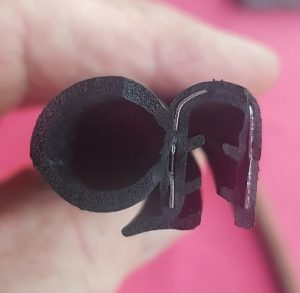
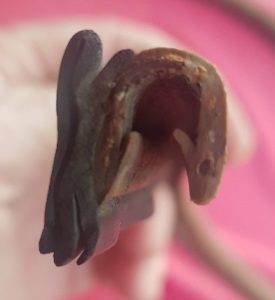
Window Seal:
With the windows out I could see the pinch weld seals were squashed and beyond being serviceable. A quick look online revealed the seals are available but quite expensive, approximately $130 -$150 per side to land in Australia, ouch. A quick trip to Clark Rubber yielded new seals for $25 per side. The difference is the OEM part has welded corners making it all 1 piece. I’ve fitted in 3 pieces, taking time to cut it neatly and overlay the corners with some trimming. The GT project is not going to be a show car, what’s important is keeping the weather out. In addition, the new seals make it quite airtight which is important for my upcoming A/C upgrade. I’m very happy with the job and the price.

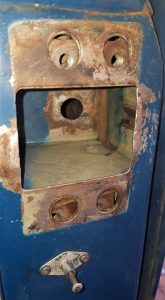
Check for Rust:
Another online search revealed it’s common for GT’s in England to have severe rust hidden underneath the chrome trim piece on the bottom sill. Ok, so I better check while I have the opportunity. The rivets securing the trim were drilled out. The GT has spent most of its life in the arid climate of Western Australia, it was grubby underneath but in good condition. It got a quick clean up, a polish, a touch up in the corners with some lanolin-based rust prevention, then the trim piece was riveted back on. The quarter window got screwed back in, followed by the trim piece that covers the B pillar using new stainless steel screws.

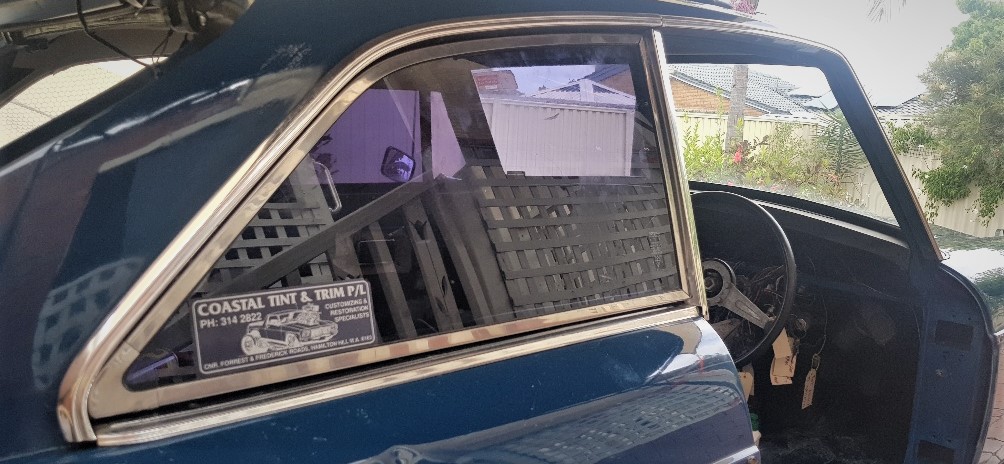
Trim Seal Colour:
The old window seal was tan in colour. I wasn’t sure how the black replacement would look. As it turned out from inside against the Autumn Leaf colour vinyl it just looked like black rubber against the trim. To my mind, it just looks like it should, and not out of place at all.
Closing Mechanism:
Many forum comments questioned how the latch on the rear quarter windows works. Some wouldn’t close, some wouldn’t stay open, while others flapped open and closed while driving along. That would be really annoying. With the job finished I was very keen to check how it operated. I’m glad to report that it works perfectly. It simply needs a firm press to close which makes a solid clasp sound as it locks into place. Additionally, it locks into place when opened and stays there. Good news. Another job ticked off the to-do list.
Happy trails all.

by David Maynard | Dec 10, 2020 | Repair
My MGB GT LE was serviced on the weekend. The car looked like it had been well maintained and became more obvious during the service. During the service it also became clear a couple of items would require future attention. More on that later.
Following is a checklist for the service:
- Drain engine oil and refill with new oil.
- Check levels and condition of oil in the diff and gearbox. The oil was clean and levels were good.
- There was some oil leaking
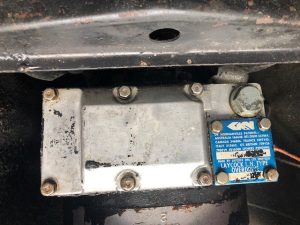 around the Laycock L.H. Style Overdrive unit. A quick online search revealed the overdrive unit shares oil with the gearbox. Accordingly, no top-up was required.
- Brake pads on the front discs were good and an adjustment was made to the rear drum brakes. There is a little vibration of the steering wheel whilst braking on a steep decline so the rotors will need machining sometime over the next several months.
- Replace spark plugs. Although the old plugs were ok we decided to replace them anyway.
- Check the distributor cap, points and condenser. These parts looked like they had been replaced in the past 6 months. We decided to leave these and return those parts for a refund.
- The mechanic had already made some impromptu adjustments to the twin SU carburettors and the timing. The final adjustments left the timing advanced a smidgen. The trade-off was to optimise performance with enough advance to the timing without the pinging.
Items for future attention:
1. Oil Cooler
The oil cooler has two fixing brackets and one of them had completely broken off. Being fixed with one brake the oil cooler is flopping around a bit. Not a good scenario in the long run and a repair will be carried out as soon as I can source a new oil cooler unit.
2. Exhaust Leak
The second item was a small leak where the exhaust is connected to the extractors, held on with a pipe bracket. This is not an issue that requires immediate attention. I am intending to have a sports exhaust fitted to the extractors in the near future which will resolve the issue.
3. Front brake rotors
The front disk brake rotors need machining or replacing as the brakes.
Outcome:
A full service was not required. Accordingly, the distributor parts were returned to the store for a credit of $96.00. In the process of tuning, the timing slightly advanced the car is running smoothly. As per above, there are a few other repairs to be carried out.
Parts list:
Oil Filter Z38
7811 spark plugs
HP 30 20w60 HPM oil
by Terry Maynard | Dec 9, 2020 | Brakes, Refurbish, Repair
The factory drum brakes on 1500 model cars are a little on the agricultural side. The stopping power of modern cars in traffic and freeway conditions made me quite nervous and got my heart racing. Visions of the precious MGA rear-ending a Hyundai or whatever is not a good scenario to be contemplating in the traffic. The options, upgrade to a disc brake system found on the later 1600 model, and/or install a brake booster system.
With some research and a chat with the MG repairer, the conclusion was that what many drivers are concerned about is often the “feel” of the brake peddle compared to a modern car. The MGA peddles being so close together, for me makes the whole action of operating the peddles slow and awkward which makes getting used to the “feel” of the old school braking system that little bit harder to adjust to. It was decided to start with installing the aftermarket brake booster with the option to go with discs later if needed.
As it turned out, the booster works fantastically. The brake pedal has a feel and touch that is more akin to what we are used to in modern cars, I also found the brakes a lot more responsive, to me, it seems to speed up the response time, important because of the awkward and close proximity of those peddles. The car readily dives in the front end now, it’s easier to apply the brakes firmly which translates into confidence driving in traffic. Gone are the visions of rear-ending a fellow road user with the precious MGA.
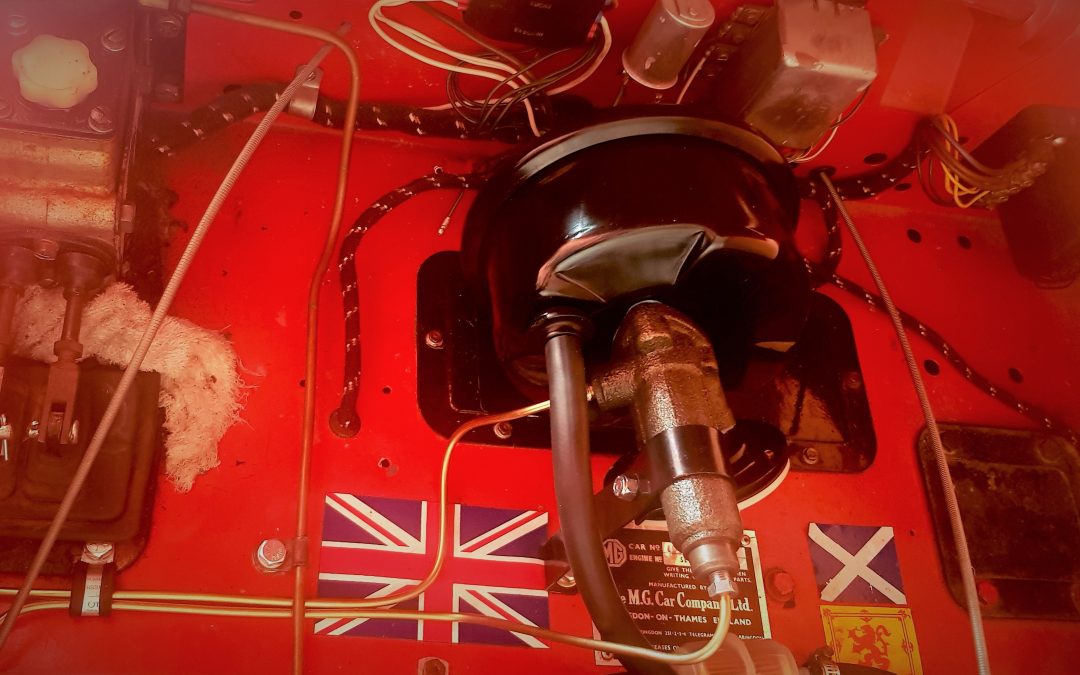
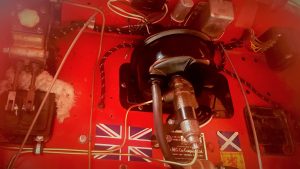
The cost in my opinion was very reasonable for the transformation it makes to confidently drive the car in modern traffic. It was a very cheap performance upgrade well worth doing. The MG repairer did a fantastic job of making it a neat and ascetic installation on the plate on the rear shelf in the engine compartment, it can be taken out and returned to factory specs easily and there are no additional and unnecessary holes in the bodywork.
by Terry Maynard | Dec 8, 2020 | Refurbish, Repair

To avoid doing this job at all, an alternative would be to buy an MGA, no window glass and its accompanying seals to deal with, otherwise, read on.
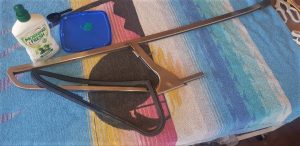
The door and window rubber on the GT was in a sorry state, hard and brittle. Time to be replaced, and If that rubber is shot, then so too will the channel rubber that the door glass slides up and down in. Order it at the same time, or if you don’t for whatever reason, (I thought mine were ok till I got a closer look), I got them from a local supplier, it is a very common type and is called “Bailey Channel”, there are 4 sizes, the MGB is the second smallest. It’s available in Australia from good old Clark Rubber, who stock over 100 different car rubbers and seals, otherwise another rubber and seal supplier, or wait another week for an order to arrive from the UK. And do order the gasket between the frame and trim piece. Also, get some non-curing mastic and new rivets from your hardware.
Here is a link to part 1 and part 2 of an excellent YouTube vid on how this is done, very handy. I followed this procedure with only 1 or 2 minor departures.
Part 1….. https://www.youtube.com/watch?v=KE-kIhL_0v8&t=617s
Part 2….. https://www.youtube.com/watch?v=buAh5rLwh74&t=1104s

Follow the steps in the vids, a departure will likely require going back a step to do it again? It is one of those jobs that is a slow and patient process. After completing one door the next will be a lot easier but it still takes time, for example, the quarter window glass is best held in place with its frame and new rubber with clamps overnight. The driver’s door was off the car so I did that one on the bench, the passenger door was done on the car and I found it much easier as the door was held in situ. I won’t describe the procedure step by step as the YouTube vid does that, but I’ll note key points to take notice of.
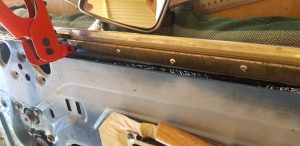
I soaked all the nuts and bolts in CRC a couple of days prior to starting the job. The 1st two bolts that come out allow the rear side window glass channel to be taken out. Paying attention to how this comes out will be handy for when it has to go back in, which will take some maneuvering to get it lined up and secured again.
I soaked all the nuts and bolts in CRC a couple of days prior to starting the job. The 1st two bolts that come out allow the rear side window glass channel to be taken out. Paying attention to how this comes out will be handy for when it has to go back in, which will take some maneuvering to get it lined up and secured again.
Take note how the 2 attaching points on the window glass rail slip out of its channel, it will be useful for when it goes back in. Fitting the glass back in the door that was still on the car just fell into place easily and was much easier than the door I did on the bench which required me having to hold the door as well as locate the channel. I didn’t replace the rubber in the window class channel, although it was old and brittle, it was not going to budge and come apart so I decided it was best left there. Grease up both rails on this channel before putting it back in.
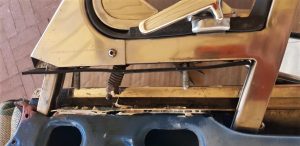
In the video, he didn’t take off the top trim piece that holds the window weather seal rubber which is secured to the door by rivets. This is one of my departures as I found it necessary to take this off for two reasons. Firstly the quarter window frame comes out a lot easier together with this piece, and secondly, the frame goes back on a lot easier with this trim piece held together. It’s because of the odd angle of the bolts and spring tensioner, if that trim is on the door the holes don’t line up when you try to marry the frame to it because of the angles, so hold that trim to the frame and marry these two pieces to the door and it will go back in smoothly. The bonus is you get to clean up the trim piece, polish up the duco under it, put a new bead of non-curing mastic between the door and the trim piece, the new gasket between the frame and trim piece and put it back with nice shiny new rivets. Yippie!
When you put in the new Bailey Channel, notice that the one taken out had a couple of spots of glue. Put a few dots of glue to hold the new Bailey Channel in place. Some months down the track the thought of this sliding down the channel and me having to open it all up again to fix it would not be a good outcome, no sir eeee, gluing it now is a good idea.
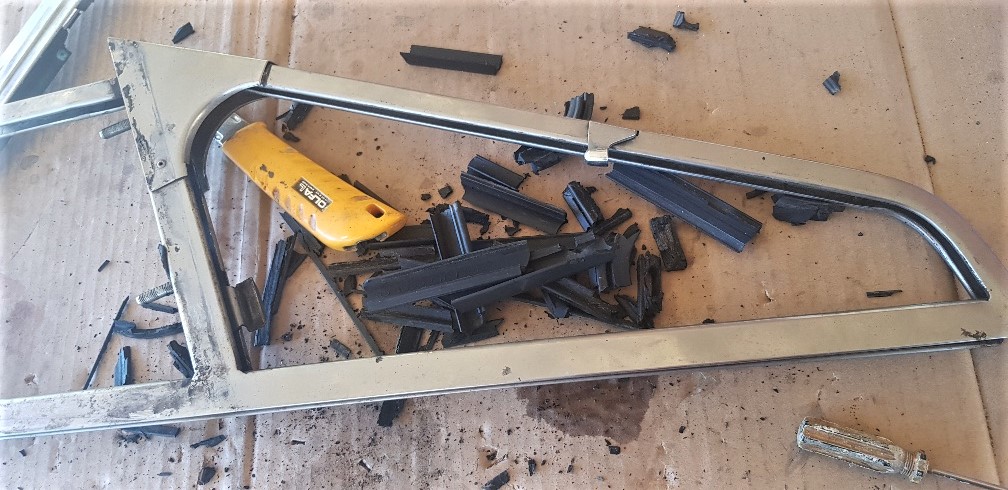
Quarter window rubber weather seal. It’s an ideal time to clean up and polish the frame. When fixing the new rubber, the use of dishwashing detergent readily available from the kitchen acts as a great lubricant to help the new rubber to slide and pop into place, starting at the top of the frame and working your way down. Job done, and it will be gratifying compared to the hard brittle stuff you took out.
Gently pry apart and separate the quarter window glass from it’s 2 sided frame. Putting it back together I found it best to hold the frame in a vice, try to put the new rubber in the channel and hold it in place as best as you can with pegs or small clamps. Doing the second door I discovered it was easier to firstly jam in the little semicircular chrome piece into its corner, holding it in place so it doesn’t slip out, and slowly marry the glass to all this. Be mindful of the length of rubber, keep trying to stretch it out as you go so it won’t come up short, all the time using the dishwashing detergent as a lubricant. The glass will want to keep sliding and popping it’s way back out, keep working it in and down, when it gets closer to where it needs to be, apply some clamps to press it all the way in. Once it is all the way in I found it best to leave it clamped overnight. The next morning the excess rubber can be trimmed with a sharp blade. Tighten the spring bolt that puts tension on the glass within its frame so it will stay open when driving along and not blow shut.
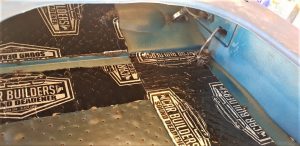
While the door was free of its burdensome parts it is a good opportunity to give it all a thorough clean up inside and out. Some degreaser for greasy parts and orange-based cleaner gets it done. I hit a couple of small surface rust spots with a rust treatment, primed with red oxide, undercoated and touched up the paint with a spray can that was prepared by my local automotive paint store. I took the opportunity to also apply some additional sound deadening, surface cleaned with isopropyl so the self-adhesive strips stick well.
The door glass weatherstrip. A light spray with CRC gives it some slip, gently tap the little spring clips off, I used a jeweller’s screwdriver and a small tack hammer then grabbed with needle-nose pliers.
Put the new weatherstrip on after putting the frame back in but before the glass goes in to trim and align it properly. Putting those little spring clips back on is fiddly, the combination of holding the clip with needle-nose pliers, twisting a flat blade screwdriver to gently get the clip started, and finally, multi-grip pliers to bed it into its right place. Use more dishwashing detergent to lubricate the new weatherstrip so the window glass going up and down as you test it won’t grab.

Putting it all back together I put a dab of copper grease on all the nuts and bolts to make it easier in the event that someone else does this job 40 or 50 years down the track. Ummm, maybe that’s not likely, but who knows.

Take the time to oil up the window winding mechanism, all the joints and grease the cog behind the window winding handle inside. And I hope you ordered the top rubber trim that crowns the window glass and frame in all its glory, now is a good time to fit it. (See top picture.)
Happy door window glass rubber and seal replacements(:
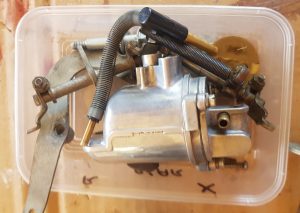
by Terry Maynard | Dec 8, 2020 | Carburettors, Refurbish, Repair
With thanks and credit to Mark for contributing this information, symptoms, diagnosis and solution to fix an air leak around a worn throttle shaft on an SU carburettor.
Those who have been around classic cars and SU carburettors would be familiar with this issue and may have wondered why SU did very little to correct this known problem in their carburettors. Maybe being relatively new to classic SU equipped cars this is a recent development with your own car?

Symptoms:
Attempts to balance the carbs when they appear to be well balanced only to go completely out of balance at the touch of the throttle. Missing, stalling and running rough at idle and driving, or stalling and the car won’t start again.
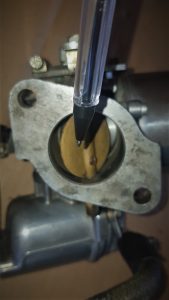
Diagnose:
With a can of carb cleaner, while the car is idling, spray around the area of the suspected shaft. If an air leak exists the carb cleaner will get sucked into the intake manifold and the car will stall. Problem diagnosed.
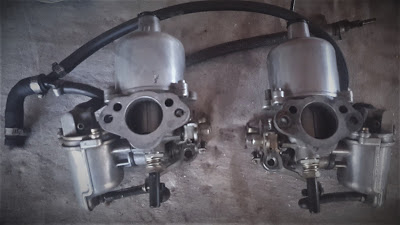
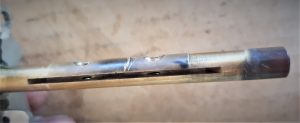
The fix:
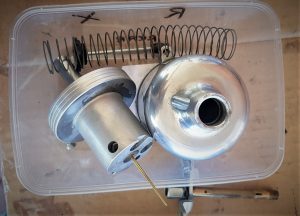
Offending carb off the car, it is disassembled and rebuilt involving new oversize bushings, shaft, butterfly valve, seals, gaskets, and the locating holes for the throttle shaft are reamed, a specific glue is applied to the new bushes, it also is an ideal time to clean, inspect and rebuild the carburettor or multiples if that is the case.
We read about clever people with well-equipped home workshops. They have time on their hands and either knowledge or insatiable desire to get in learn. Furthermore, for the budget-conscious home mechanic, there are savings to be had by learning how to do it yourself.
Alternatively, classic car owners that don’t fit into the above category are left with the option to get someone to do it for them. Car or carbs get delivered to the repair shop and, many dollars later they are refurbished, put back on the car and working as expected, along with a hefty invoice for the privilege.
An alternative solution:
This information is the journey Mark embarked on in the pursuit to fix this problem on his own MGB. Additionally, with limited time, tools and technical know-how to rebuild his carbs at home Mark was working to a budget. A “Wanted” listing in our local MGCC chapter yielded a second-hand set of SU’s from me. However, there was some play in the throttle shaft, and we talked about the risk of inheriting the same problem.
Actual Solution:
As it turned out after getting his purchase home, inspection revealed that the shaft on this set was worn as well. All was not lost though as the set he got from me were in much better overall condition so further research led him to bite the bullet on attempting a rebuild at home. A visit to an SU repair specialist revealed he didn’t have the tools and skill to hone the body to accept the new shafts or the specific glue to secure the new bushings. The shop offered their services for this part of the job so the correct rebuild kit was sourced, SU H4 AUD325F and R (the F is for Front carb, R would be for rear), identified on the little metal tag usually located on the float chamber. The AUD number identifies the specific model with its unique modifications. As I understand, the many variations usually related to emissions control changes at the time that the MG factory was having to keep abreast of.

Finished job:
The carbs are on the car and running now. Marks original solution was to save time and money buying a set of second-hand carbs. In conclusion, his fix was to rebuild these carbs anyway. His attitude to buying into the second set of carbs with the same problem was to say, “it is what it is”. His search for a solution leads him down a path that yielded him a better overall set of carbs and taught him a new set of skills. It sounds like a win-win to me. Consequently, Mark is better equipped to maintain his own car. He’s very happy with the result.
Happy trails MGer’s….

Recent Comments