
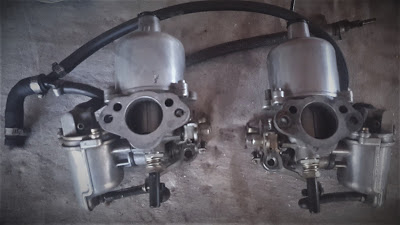
SU Carburettor Worn Throttle Shaft Air Leak Symptoms and Fix
With thanks and credit to Mark for contributing this information, symptoms, diagnosis and solution to fix an air leak around a worn throttle shaft on an SU carburettor.
Those who have been around classic cars and SU carburettors would be familiar with this issue and may have wondered why SU did very little to correct this known problem in their carburettors. Maybe being relatively new to classic SU equipped cars this is a recent development with your own car?

Symptoms:
Attempts to balance the carbs when they appear to be well balanced only to go completely out of balance at the touch of the throttle. Missing, stalling and running rough at idle and driving, or stalling and the car won’t start again.
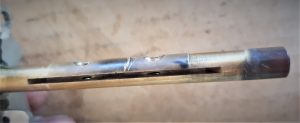
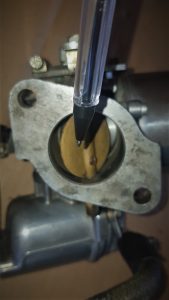
Diagnose:
With a can of carb cleaner, while the car is idling, spray around the area of the suspected shaft. If an air leak exists the carb cleaner will get sucked into the intake manifold and the car will stall. Problem diagnosed.
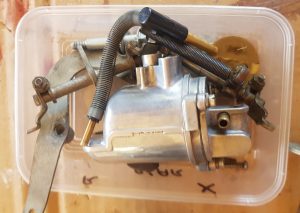
The fix:
Offending carb off the car, it is disassembled and rebuilt involving new oversize bushings, shaft, butterfly valve, seals, gaskets, and the locating holes for the throttle shaft are reamed, a specific glue is applied to the new bushes, it also is an ideal time to clean, inspect and rebuild the carburettor or multiples if that is the case.
We read about clever people with well-equipped home workshops. They have time on their hands and either knowledge or insatiable desire to get in learn. Furthermore, for the budget-conscious home mechanic, there are savings to be had by learning how to do it yourself.
Alternatively, classic car owners that don’t fit into the above category are left with the option to get someone to do it for them. Car or carbs get delivered to the repair shop and, many dollars later they are refurbished, put back on the car and working as expected, along with a hefty invoice for the privilege.
An alternative solution:
This information is the journey Mark embarked on in the pursuit to fix this problem on his own MGB. Additionally, with limited time, tools and technical know-how to rebuild his carbs at home Mark was working to a budget. A “Wanted” listing in our local MGCC chapter yielded a second-hand set of SU’s from me. However, there was some play in the throttle shaft, and we talked about the risk of inheriting the same problem.
Actual Solution:
As it turned out after getting his purchase home, inspection revealed that the shaft on this set was worn as well. All was not lost though as the set he got from me were in much better overall condition so further research led him to bite the bullet on attempting a rebuild at home. A visit to an SU repair specialist revealed he didn’t have the tools and skill to hone the body to accept the new shafts or the specific glue to secure the new bushings. The shop offered their services for this part of the job so the correct rebuild kit was sourced, SU H4 AUD325F and R (the F is for Front carb, R would be for rear), identified on the little metal tag usually located on the float chamber. The AUD number identifies the specific model with its unique modifications. As I understand, the many variations usually related to emissions control changes at the time that the MG factory was having to keep abreast of.

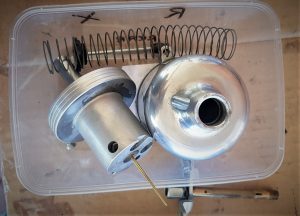
Finished job:
The carbs are on the car and running now. Marks original solution was to save time and money buying a set of second-hand carbs. In conclusion, his fix was to rebuild these carbs anyway. His attitude to buying into the second set of carbs with the same problem was to say, “it is what it is”. His search for a solution leads him down a path that yielded him a better overall set of carbs and taught him a new set of skills. It sounds like a win-win to me. Consequently, Mark is better equipped to maintain his own car. He’s very happy with the result.
Happy trails MGer’s….
Recent Comments