by Terry Maynard | Dec 28, 2020 | Refurbish
I’ve never driven the GT so I have no idea if sound deeding is even needed. My goal for the GT is to be my daily driver up to retirement and beyond. Therefore, I plan to use it for quite a few years so its imperative to have a comfortable car to service my requirements.
What to consider:
My main goal is to be able to have normal conversations. In other words, I don’t want to be competing with road and car noises. I do have some hearing loss and I have personally found many modern cars have enough road noise to restrict a regular conversation.

Additionally, there is a consideration for acoustics and audio systems. Ten years ago that very likely would have mattered. Not so now. Modern technology presents alternative options for audio. My young adult children for example want to use Bluetooth to connect their own gadgets wherever they go. Likewise, I’m doing the same more and more.
Some of the portable and rechargeable Bluetooth speakers available put out a pretty decent sound. Also, over the last year, I’ve tended to use personal Bluetooth headsets with great quality audio throughout the day. Importantly, this allows me to connect with a growing amount of audible content on my own device and that gives access to multiple sources. For example, audiobooks, music, streams of content that I learn from throughout most days, news, on-line study lectures, and my phone calls are picked up automatically. Fantastic.
Then there’s the heat generated from the gearbox tunnel and the exhaust system. Importantly, living in a hot climate I want to install an AC system so it’s important to insulate for heat in the GT.
Sound Deadening:
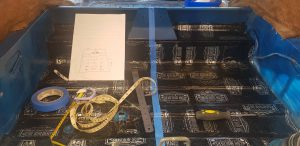
Researching which product will best meet my goals at a cost-effective price presents many options. Regarding sounddedening, there are primarily 2 sound-deadening materials commonly used. Firstly, foam products absorb sound. Secondly, a tar-based Butyl product when stuck to the surface acts to reduce sound-related vibration being transferred through the flat metal body panels. For the GT I primarily used Butyl.
Additionally, I used a 15mm heat rated foam underlay on the floors and front bulkhead.
Heat shield:
There was already a fibreglass based heat shield over the front portion of the gearbox tunnel. The remainder of the tunnel was covered with the Butyl sound deadener. Finally, overall the tunnel and the front bulkhead, I added a 10mm peel and stick foam-based heat shield from Clark Rubber, Australia.
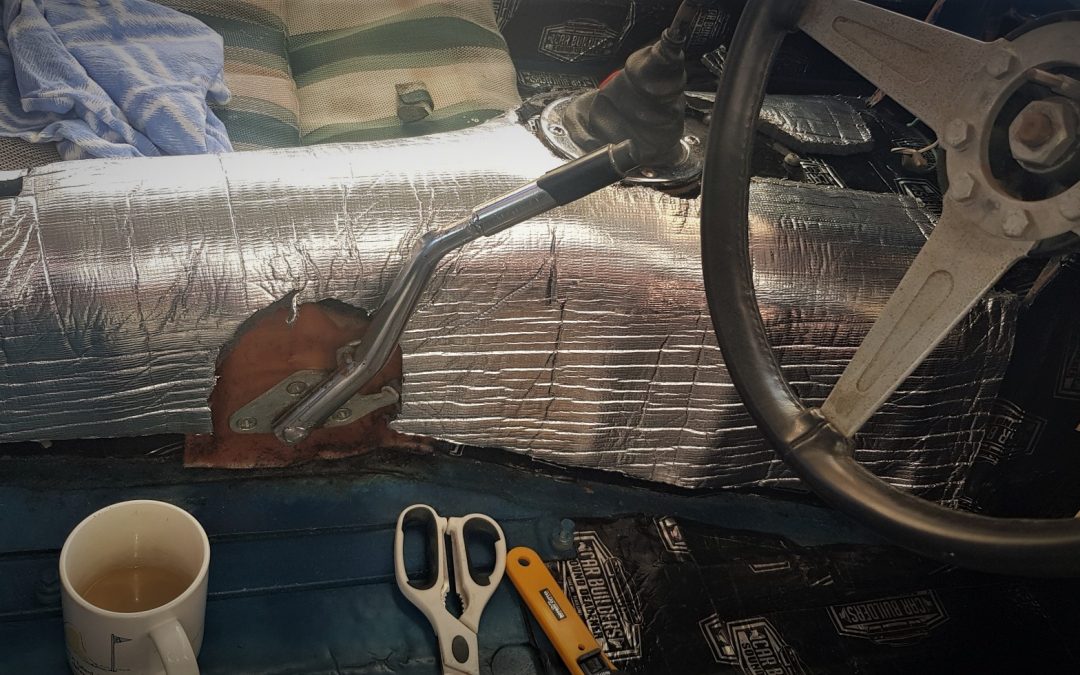
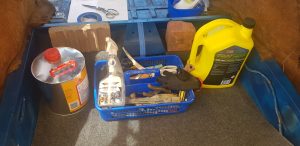
Application:
Use an alcohol-based product to clean the surface first. Secondly, the right tools make applying the Butyl product much easier. When ordering, also order the roller wheel to work it onto all the surfaces. Additionally, besides the rounded wooden handle on the back of the roller tool, I improvised some tools at home to work corners and around obstructions. For example, a potato peeler with the cutting part taken out is excellent for getting in sharp corners and edges. Thirdly, use the alfoil tape on all the seams and finish off all the edges to prevent moister and cutting your fingers in the future.
Finally, it’s important not to leave air pockets under the Butyl sheets. Moister can get trapped which can lead to rust in the future. Not a good scenario. I cut around some floor cavities so as not to leave air pockets. These spots can be maintained with a regime of regularly dressing with rust prevention. For example, I use lanolin-based rust prevention as part of my regular maintenance, once a year I’ll lift the mats and brush it into these seams, cavities and crevasses.

Summary:
Overall, there is quite a lot of sound deadening and heat shield product throughout the car. Do some research on what is available, how it works, and where to use it. Additionally, understand your goals and budget to decide on the way to progress your project.
Happy MG trails…..
by Terry Maynard | Dec 28, 2020 | Refurbish, Upgrade
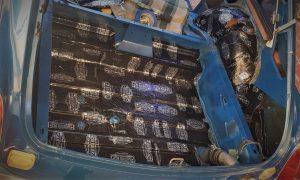
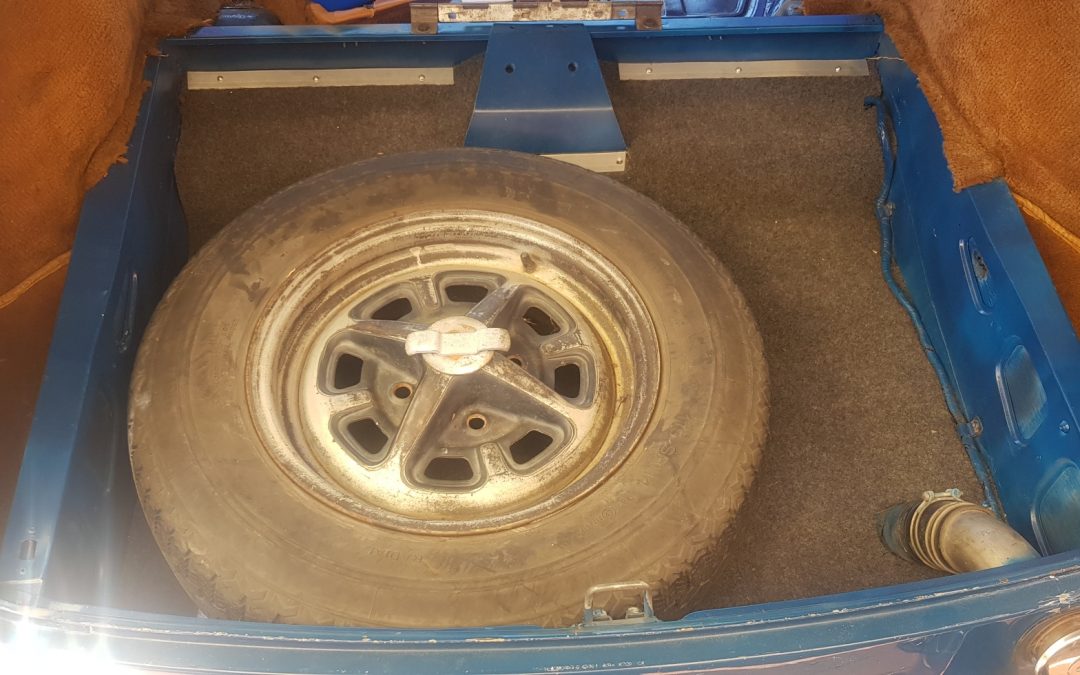
After this job was completed I started to notice that many pics of GT’s online had an untidy boot space. It seems logical to me to tidy it up. Therefore, this is how I tidied up the boot space on the GT project.
I chose a budget-friendly car carpet in neutral grey tones from a local supplier. Additionally, as the plan is to do quite a few of the interior carpet pieces myself, I thought it prudent to learn some trimming tricks and tips. Quite a few tutorials later I realised I would also need to shop for some decent tools before making a start.
How to:
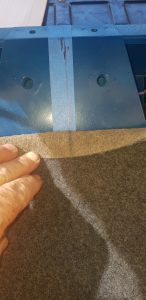
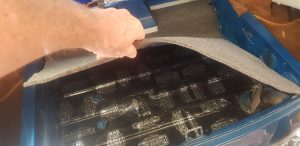
There are some tips to get a clean fitting finish. A centre line in the boot was marked on some low tac tape as a reference point. Additionally, a centre line was marked on the backside of the carpet with a suitable marker. Checked multiple times, the measurements were transferred to the carpet. Being my 1st attempt I cut roughly 5mm over the lines to stay on the safe side. I anticipate my skills improving the more I do this.
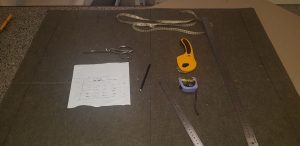
The ribs in the boot floor were also measured and marked on the carpet as reference points. I found with more reference points to check it’s easier to get the curved lines marked out on the carpet. I used a compass to mark out circles. Importantly, regularly put the carpet piece in and out of the boot making cuts to check the centre lines and reference points. This keeps you on track.
Moulding Carpet:
To mold carpet in internal corners or contours, spray the area with warm water from a spray bottle. Then, shape and form it with your fist or wooden handle as you place weights to hold the carpet in place. Finally, I left it overnight to help it retain its shape. This process of spaying with hot water, moulding, the use of weights and leaving it overnight works.
Fine-tuning:
With the reference points, I was able to get a neat curved line at the back. Additionally, that 5mm left on my 1st cuts were slowly trimmed, regularly putting it in the boot and checking the centre lines and reference points. Importantly, I used this method to get a clean cut around the fuel filler hose as well.
Happy with my handy work, I contemplated how to finish it off neatly around the shelf towards the front. I simply chose to use some flat aluminium strips screwed down with stainless steel screws. This works well because it secures the carpet in the boot and as a finishing trim it looks good and makes the job look neat. Also, it can easily be lifted up to clean or vacuum, and it can easily be taken out to return the car to the original equipment.
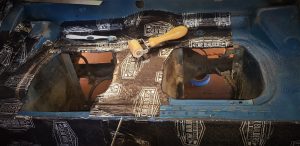
Repairs:
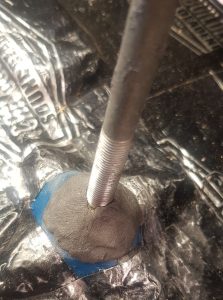
The nut inside the wheel clamp point on the boot floor had worked loose. The repair was going to be necessary for it to work properly. With the surfaces prepared and the wheel retainer screwed into the nut, a piece of 2 pack weld putty from the local hardware was properly kneaded then worked into the hole where the nut locates. Secondly, the clamp was screwed down to force the nut up and hold it in position while the putty set. Thirdly, with the nut properly located, some more weld putty was moulded over and around the clamp fitting. The wheel retainer works properly now and keeps the spare wheel safely clamped down.
Happy MG trails….

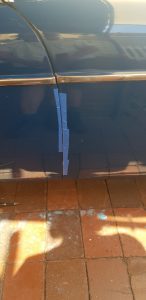
by Terry Maynard | Dec 23, 2020 | Repair
When I inherited this car the driver door would not close and open properly. The GT has had a rough life and the drivers door had seen abuse of some kind. Closer inspection revealed the door had been messed around with a lot and still wasn’t right, however, I didn’t know how to adjust a door. Importantly, learning how to do this job taught me that a casual approach to adjusting doors and panels will quickly turn into a humbling experience. It is definitely a job to understand properly to have any hope of getting it right unless you get lucky.

Tools:
- A Posi Drive No.4 for the hinge screws.
- Some Alan key bolts to replace these. I took the old screws with me to a local fasteners store who supplied what I needed.
- Low tack masking tape.
- Be prepared to make or improvise for some shims.
- A lot of research and patients.
- Rivets and rivet gun.
- Impact driver.
- 2 decks of playing cards.
- Low tac masking tape.
- Straight edge.
- Feeler gauges.
Remove Hinges:
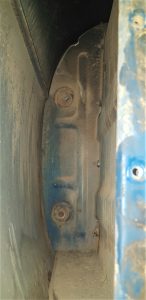
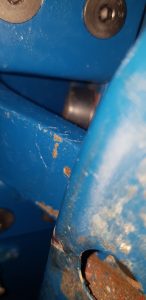
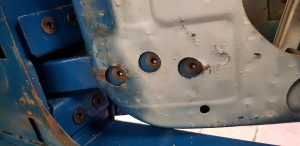
The driver door hinges were worn making my early attempts to adjust the door futile. The first job then is to get them out for inspection. There’s a lot of good tutorials online on how to do this or follow the workshop manual. An impact hammer can help loosen rusted posi screws. Besides the 4 posi screws on the front of the hinge, behind the hinge is a bolt that extends through the A-pillar. The nuts are located in the space behind the splash panel in the front wheel arch. The space between the front quarter panel and the frame is tight to get an arm and socket in there. Additionally, the nuts might be very tight after 50 odd years, give them a generous soaking in a multi-purpose penetrant.
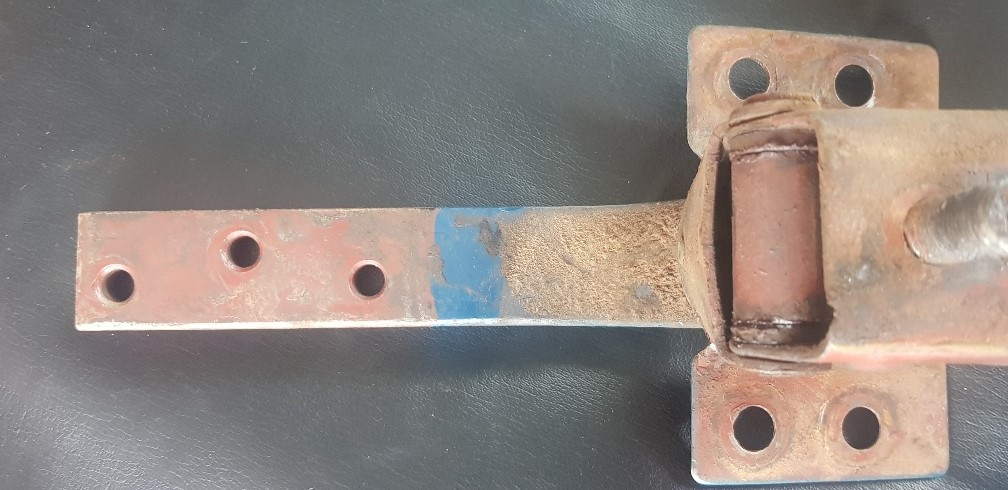
Hinges:
New hinges are available but expensive. Second-hand hinges purchased online might just yield the same problem of worn pins. With an angle grinder, a punch and a hammer, I was able to liberate the pins from the hinges. Yep, definitely worn. I visited a few small local engineering workshops till I found someone willing to fabricate new pins for me. When they were ready to be picked up I was informed the price was a carton of beer. Great, I like the currency.
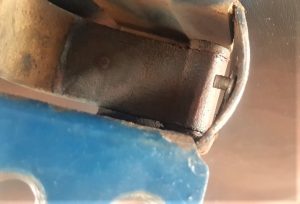
One of the little rubber bumper stops in the hinge was worn and perished, the other was missing. I tracked replacements online, they were very cheap, only a few dollars. In due course, they were riveted on the hinge using a little stainless steel washer for the rivet to grip onto.
Door Alignment:
I found a very good tutorial on how to approach fitting doors. Importantly, following this procedure will get the job done. The number one most important thing is to familiarize yourself with the way it all works. This actually takes attempting to adjust the door and failing at it several times. Failure leads to research, a better understanding of the process, and eventually success. (Life hack tip included at no extra cost.)
Ok, so after being humbled a few times I was now ready to follow a procedure. Who would have known the skills of a panel beater are technical, they work to specifications and tolerances. For instance, if panels and welding and such is not done to specifications, aligning doors and panels is made difficult.
1. The original posi screws can be used to start the adjusting process. If you decided to purchase replacements they can be swapped out later. Alternatively, the new screws can be used first. As a starting point, semi-tighten the hinges in the A-pillar as high and as far outboard as possible. Leave the nut behind the splash panels for now.
2. Semi-tighten the door to the hinge arms. A second person or a milk crate offer good support to the door. Remove the striker plate from the B pillar.
3. Protect the paint from the door and front fender from fouling each other when adjusting the door. Run some low tac masking tape along the leading edge of the door and back edge of the front panel. Close the door slowly and check the door and panels don’t kiss.
4. As a starting point, place 2 stacks of 30 playing cards each on the door sill. One each towards the A and B pillars. You will add and take away cards from these packs adjusting the height and gap. Additionally, note the number of cards for future reference.
5. Adjust the fore and aft position to get even gaps to the front and rear fenders.
6. Using your eye and a straight edge, adjust the height. Add or take away playing cards and keep evaluating. Repeat till you’re satisfied with the gaps all around the door.
7. When you think you have it, tighten the hinge and door screws.
8. Remove the playing cards and check the door again slowly. At the B pillar, the door may drop slightly. Estimate how many playing cards to add, close the door, loosen the hinge, open the door slightly to add the cards, tighten the hinge again and evaluate. Repeat till you think you’ve got it.
9. Take note of the number of playing cards at each end.
So the height and gap are ultimately locked in, now to the next phase.
10. The leading edge of the door is controlled by the front hinges. Supposedly, the door is proud of the fender a bit, remember you mounted the hinges as far outboard as they could go. Back off the hinge mounting screws a bit, close the door, now press the forward edge into the car until it’s flush with the fender. Carefully open the door, and tighten up the hinges. Repeat until it is satisfactory. Do each hinge separately, ideally, get the top of the door flush by adjusting the top hinge first, and the bottom of the door with the bottom hinge.
Note: If the car has had panel work done in the past, it’s possible the available adjustments won’t get the door to where it needs to be. This is where you need to get creative with shims and alternative methods to get it right.
Example 1: the door may not come out to the fender, even with the hinge adjusted as far outboard as it will go. The fix is to measure the adjustment needed using a straight-edge and feeler gauges, and then make a shim up out of sheet metal just a bit thicker than needed. The shim needs to be roughly the size/length of the portion of the hinge arm that’s inside the door, with holes to allow the hinge/door bolts to pass through. The shim then goes between the outside face of the hinge arm and the door – effectively moving the door farther outside of the hinge position.
Example 2: The first time I finished following these steps, there was a 30mm + gap between the driver’s door frame and the top of the window glass while wound up. It clearly wasn’t going to seal against the door rubber properly when closed and needed to be done again. Additionally, the bottom of the door didn’t come out to the sill although the hinge was as far outboard as it would go.
My solution required two steps. Firstly, I fabricated a shim for the bottom hinge to push the bottom out and at the same time tilt the top in. Secondly, I checked and made adjustments at the bottom of the window rails inside the door, effectively pushing the bottom of the glass out that tilted the top of the glass in. These two steps combined to bring the top of the glass closer to the frame by about 10 mm, now it will seal properly with the door rubber. On my car, there is evidence of previous repairs or damage to either the sill, door, front fender, or all 3.
Example 3: What if the hinge is mounted as far inboard as possible and the door is still proud of the fender. Using the straight edge and feeler gauges again, measure the gap. This is the amount of material that has to be removed from the hinge arm. There’s plenty of thickness on the hinges to accommodate this creative fix.
Importantly, decisions need to be made about what is tolerable based on the goals of the project. For example, my car is not going to be a showpiece, my goal is to refurbish and work with what I have. I was satisfied with this second attempt even though the bottom of the trailing edge of the door still sits slightly inboard of the sill. It is a vast improvement from what I started with. However, decisions made about panel gap and alignment on a comprehensive restoration project are going to be very different to my project.
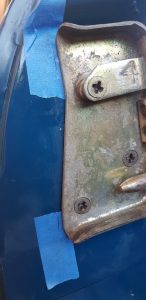
Striker plate:
11. Finally, mount the striker plate loosely to the B pillar. It moves backwards/forwards (horizontal), up/down (vertical), and rotates a little. Note, partway through this phase I realised the striker plate needed to be shimmed out just a bit so it would align with the door latch cleanly. Follow these steps. Firstly, line it up vertically by slowly closing the door with your eyes at latch level, moving the striker plate up/down and rotating it so that the bottom of the latch on the door just clears the striker plate, and the latch engages the striker cleanly. Tighten the screws. Evaluate and repeat as needed. That aligns the striker plate vertically, up/down.
12. Secondly, now align the striker plate horizontally in/out from the centerline of the car so that the trailing edge of the door is flush with the rear quarter panel. On the B pillar, using low tack masking tape, put a strip just above and below the plate vertically, and 2 strips on horizontal top and bottom. With a fine point marker, put reference marks on the tape so that the horizontal in/out movement of the plate can be made even while maintaining the vertical up/down position (you don’t want to change the vertical position of the plate, since you’ve got that set, and you don’t want to rotate the plate either). Close the door, evaluate the trailing edge of the door with the rear quarter panel for ‘flushness’. Ideally, measure it if you’re close with a straight edge and feeler gauges. Now open the door, loosen the striker plate screws a bit, and move the plate in or out the corresponding amount. I did this by eye with incremental adjustments of the striker plate using my reference marks to maintain the vertical position of the plate. Tighten up the screws, close the door, and reevaluate. Repeat as necessary.
You’re finished:
If you are going to replace the posi drive screws with alternatives, now they can be swapped out one at a time.
When the job is done, tighten up the hinge bolts inside the splash panel. After that, it’s an opportunity to clean up and apply anti-corrosion treatment before putting the splash panels back on.
If the doors are not coming off again, you’re done. YIPPEE. However, if the doors need to come off for whatever reason, for panel and paint for example, follow this step. Drill 2 locating holes of 3mm into the striker plate and hinges. Corresponding size pieces of rod in the holes then become locating pins for when the doors go back on.
This trick works for boot and bonnet hinges as well. Finally, it is best to do the adjustments before the panel and paint. All that messing around after painting will mess it up, not good!
Happy door and panel trails 🙂
by Terry Maynard | Dec 13, 2020 | Refurbish, Repair
Bent Hinges:
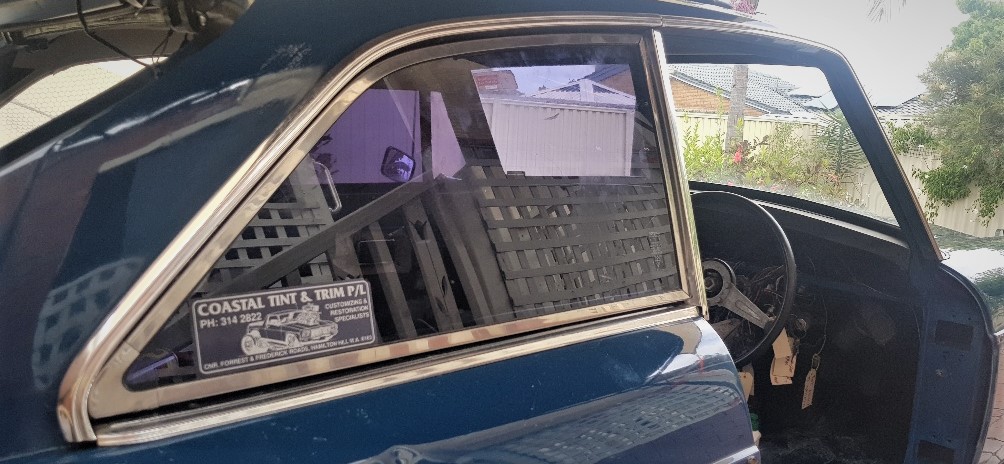
When the GT was towed home it got loaded backwards on the flatbed truck. The rear quarter window latches were not connected. At freeway speeds, the windows wanted to blow open which caused the hinges to stretch. Fortunately, the driver noticed and stopped to secure them but not before the hinges got bent out of shape a bit. The windows wouldn’t close into the frame anymore. The solution was to take them out and reshape the hinges This was a delicate job to do without breaking the rivets holding the hinge to the window.
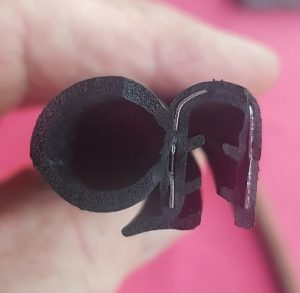
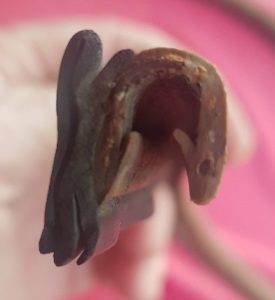
Window Seal:
With the windows out I could see the pinch weld seals were squashed and beyond being serviceable. A quick look online revealed the seals are available but quite expensive, approximately $130 -$150 per side to land in Australia, ouch. A quick trip to Clark Rubber yielded new seals for $25 per side. The difference is the OEM part has welded corners making it all 1 piece. I’ve fitted in 3 pieces, taking time to cut it neatly and overlay the corners with some trimming. The GT project is not going to be a show car, what’s important is keeping the weather out. In addition, the new seals make it quite airtight which is important for my upcoming A/C upgrade. I’m very happy with the job and the price.

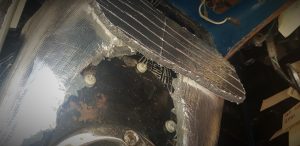
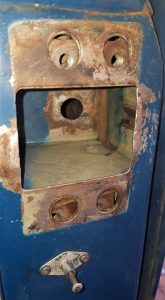
Check for Rust:
Another online search revealed it’s common for GT’s in England to have severe rust hidden underneath the chrome trim piece on the bottom sill. Ok, so I better check while I have the opportunity. The rivets securing the trim were drilled out. The GT has spent most of its life in the arid climate of Western Australia, it was grubby underneath but in good condition. It got a quick clean up, a polish, a touch up in the corners with some lanolin-based rust prevention, then the trim piece was riveted back on. The quarter window got screwed back in, followed by the trim piece that covers the B pillar using new stainless steel screws.

Trim Seal Colour:
The old window seal was tan in colour. I wasn’t sure how the black replacement would look. As it turned out from inside against the Autumn Leaf colour vinyl it just looked like black rubber against the trim. To my mind, it just looks like it should, and not out of place at all.
Closing Mechanism:
Many forum comments questioned how the latch on the rear quarter windows works. Some wouldn’t close, some wouldn’t stay open, while others flapped open and closed while driving along. That would be really annoying. With the job finished I was very keen to check how it operated. I’m glad to report that it works perfectly. It simply needs a firm press to close which makes a solid clasp sound as it locks into place. Additionally, it locks into place when opened and stays there. Good news. Another job ticked off the to-do list.
Happy trails all.


Recent Comments