by Terry Maynard | Dec 28, 2020 | Refurbish
I’ve never driven the GT so I have no idea if sound deeding is even needed. My goal for the GT is to be my daily driver up to retirement and beyond. Therefore, I plan to use it for quite a few years so its imperative to have a comfortable car to service my requirements.
What to consider:
My main goal is to be able to have normal conversations. In other words, I don’t want to be competing with road and car noises. I do have some hearing loss and I have personally found many modern cars have enough road noise to restrict a regular conversation.

Additionally, there is a consideration for acoustics and audio systems. Ten years ago that very likely would have mattered. Not so now. Modern technology presents alternative options for audio. My young adult children for example want to use Bluetooth to connect their own gadgets wherever they go. Likewise, I’m doing the same more and more.
Some of the portable and rechargeable Bluetooth speakers available put out a pretty decent sound. Also, over the last year, I’ve tended to use personal Bluetooth headsets with great quality audio throughout the day. Importantly, this allows me to connect with a growing amount of audible content on my own device and that gives access to multiple sources. For example, audiobooks, music, streams of content that I learn from throughout most days, news, on-line study lectures, and my phone calls are picked up automatically. Fantastic.
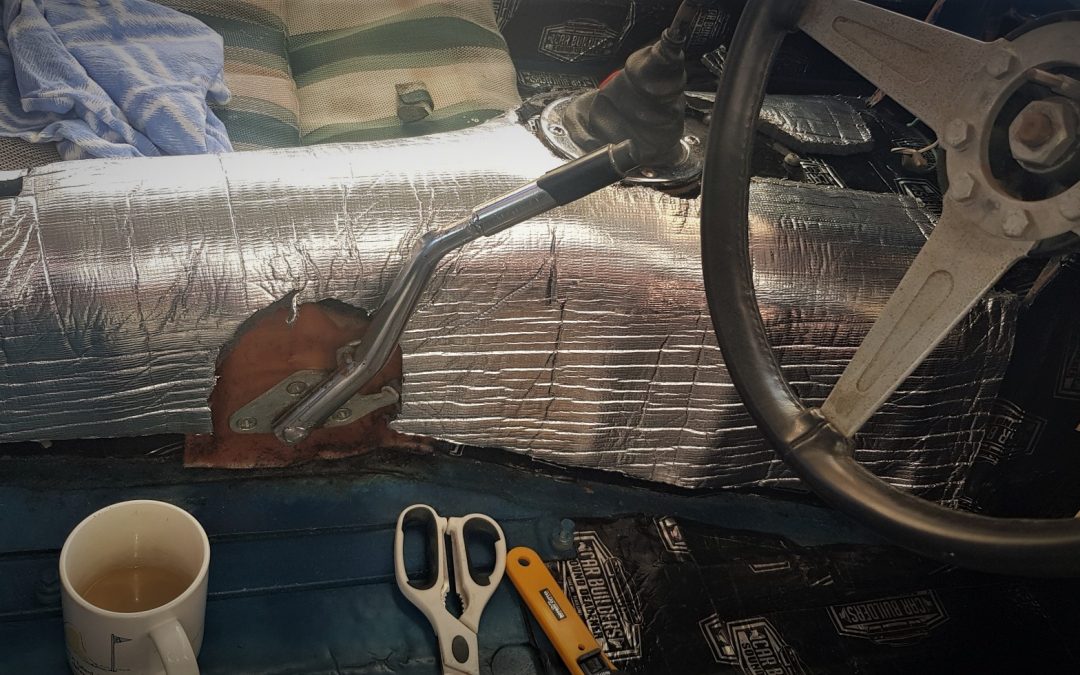
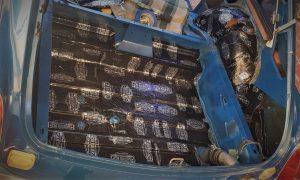
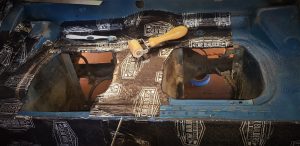
Then there’s the heat generated from the gearbox tunnel and the exhaust system. Importantly, living in a hot climate I want to install an AC system so it’s important to insulate for heat in the GT.
Sound Deadening:
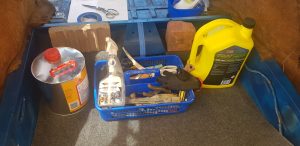
Researching which product will best meet my goals at a cost-effective price presents many options. Regarding sounddedening, there are primarily 2 sound-deadening materials commonly used. Firstly, foam products absorb sound. Secondly, a tar-based Butyl product when stuck to the surface acts to reduce sound-related vibration being transferred through the flat metal body panels. For the GT I primarily used Butyl.
Additionally, I used a 15mm heat rated foam underlay on the floors and front bulkhead.
Heat shield:
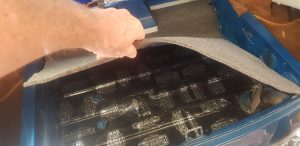
There was already a fibreglass based heat shield over the front portion of the gearbox tunnel. The remainder of the tunnel was covered with the Butyl sound deadener. Finally, overall the tunnel and the front bulkhead, I added a 10mm peel and stick foam-based heat shield from Clark Rubber, Australia.
Application:
Use an alcohol-based product to clean the surface first. Secondly, the right tools make applying the Butyl product much easier. When ordering, also order the roller wheel to work it onto all the surfaces. Additionally, besides the rounded wooden handle on the back of the roller tool, I improvised some tools at home to work corners and around obstructions. For example, a potato peeler with the cutting part taken out is excellent for getting in sharp corners and edges. Thirdly, use the alfoil tape on all the seams and finish off all the edges to prevent moister and cutting your fingers in the future.
Finally, it’s important not to leave air pockets under the Butyl sheets. Moister can get trapped which can lead to rust in the future. Not a good scenario. I cut around some floor cavities so as not to leave air pockets. These spots can be maintained with a regime of regularly dressing with rust prevention. For example, I use lanolin-based rust prevention as part of my regular maintenance, once a year I’ll lift the mats and brush it into these seams, cavities and crevasses.

Summary:
Overall, there is quite a lot of sound deadening and heat shield product throughout the car. Do some research on what is available, how it works, and where to use it. Additionally, understand your goals and budget to decide on the way to progress your project.
Happy MG trails…..
by Terry Maynard | Dec 28, 2020 | Refurbish, Upgrade
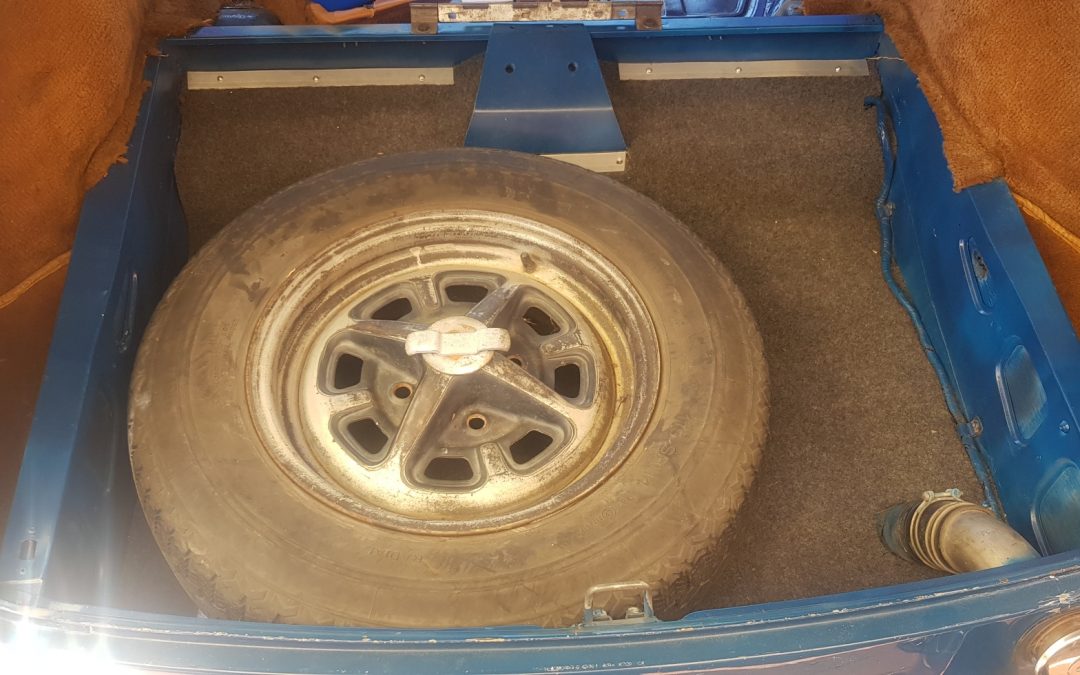
After this job was completed I started to notice that many pics of GT’s online had an untidy boot space. It seems logical to me to tidy it up. Therefore, this is how I tidied up the boot space on the GT project.
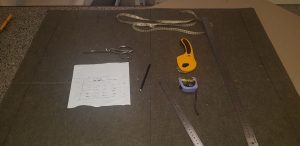
I chose a budget-friendly car carpet in neutral grey tones from a local supplier. Additionally, as the plan is to do quite a few of the interior carpet pieces myself, I thought it prudent to learn some trimming tricks and tips. Quite a few tutorials later I realised I would also need to shop for some decent tools before making a start.
How to:
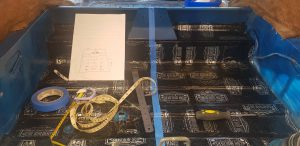
There are some tips to get a clean fitting finish. A centre line in the boot was marked on some low tac tape as a reference point. Additionally, a centre line was marked on the backside of the carpet with a suitable marker. Checked multiple times, the measurements were transferred to the carpet. Being my 1st attempt I cut roughly 5mm over the lines to stay on the safe side. I anticipate my skills improving the more I do this.
The ribs in the boot floor were also measured and marked on the carpet as reference points. I found with more reference points to check it’s easier to get the curved lines marked out on the carpet. I used a compass to mark out circles. Importantly, regularly put the carpet piece in and out of the boot making cuts to check the centre lines and reference points. This keeps you on track.
Moulding Carpet:
To mold carpet in internal corners or contours, spray the area with warm water from a spray bottle. Then, shape and form it with your fist or wooden handle as you place weights to hold the carpet in place. Finally, I left it overnight to help it retain its shape. This process of spaying with hot water, moulding, the use of weights and leaving it overnight works.
Fine-tuning:
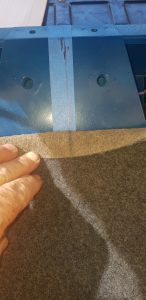
With the reference points, I was able to get a neat curved line at the back. Additionally, that 5mm left on my 1st cuts were slowly trimmed, regularly putting it in the boot and checking the centre lines and reference points. Importantly, I used this method to get a clean cut around the fuel filler hose as well.
Happy with my handy work, I contemplated how to finish it off neatly around the shelf towards the front. I simply chose to use some flat aluminium strips screwed down with stainless steel screws. This works well because it secures the carpet in the boot and as a finishing trim it looks good and makes the job look neat. Also, it can easily be lifted up to clean or vacuum, and it can easily be taken out to return the car to the original equipment.
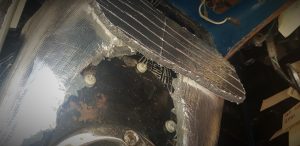
Repairs:
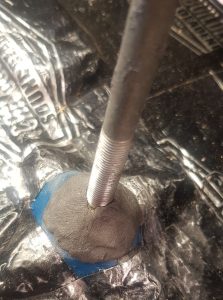
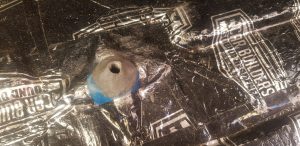
The nut inside the wheel clamp point on the boot floor had worked loose. The repair was going to be necessary for it to work properly. With the surfaces prepared and the wheel retainer screwed into the nut, a piece of 2 pack weld putty from the local hardware was properly kneaded then worked into the hole where the nut locates. Secondly, the clamp was screwed down to force the nut up and hold it in position while the putty set. Thirdly, with the nut properly located, some more weld putty was moulded over and around the clamp fitting. The wheel retainer works properly now and keeps the spare wheel safely clamped down.
Happy MG trails….

by Terry Maynard | Dec 28, 2020 | Display Cars
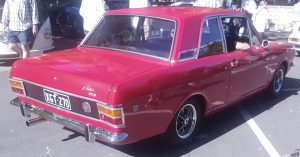
I heard about this local Cars and Coffee event that happens monthly on the UWA campus in Perth, Western Australia. Some pretty awesome cars get dusted off for the event. While there were some pretty desirable exotic, classic and rare cars, it was the everyday cars that were around in my younger days that most appealed to me. My favourite was a Sunbeam Tiger, a standard and unmolested original car driven to and from the event by a lady and her young daughter. Unfortunately, I didn’t get any pics. My next favourite was the red Cortina 2 door GT. A couple of AH Sprites in really nice restored condition came in at 3rd. The Mini Moke is Supercharged, pretty cool. The MGA was very tidy, nicely restored. And ya gotta love the Big Healy’s. A lovely old Jag and a couple of VW’s for good measure.


Recent Comments