
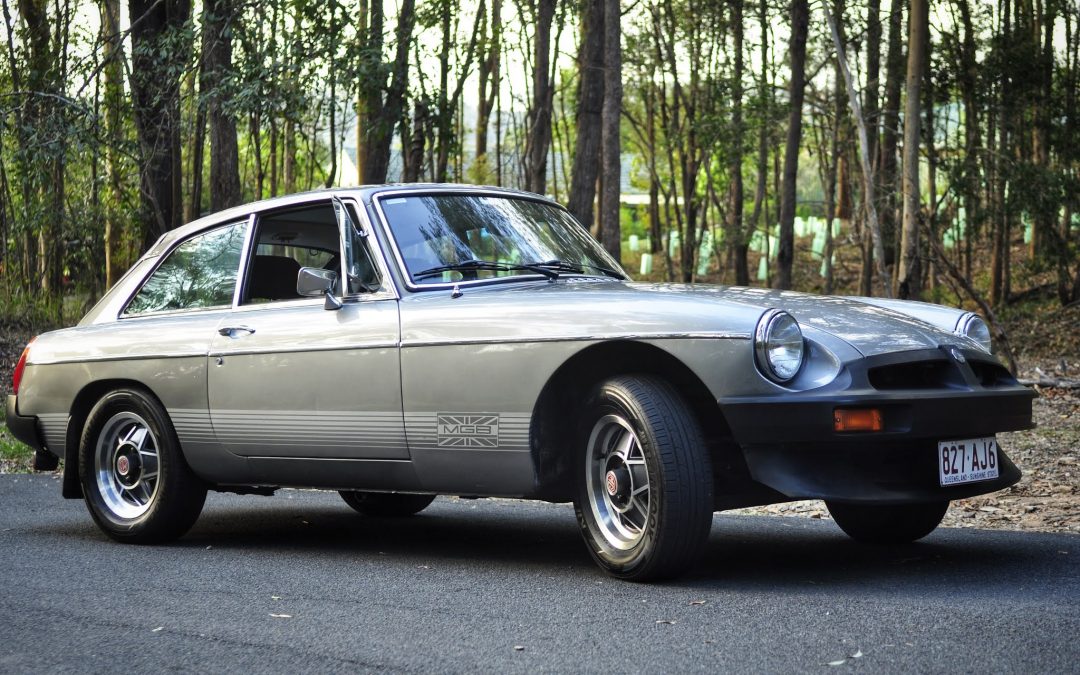
MGB GT Teal Blue Project Part 3 Refurbish Existing Paint

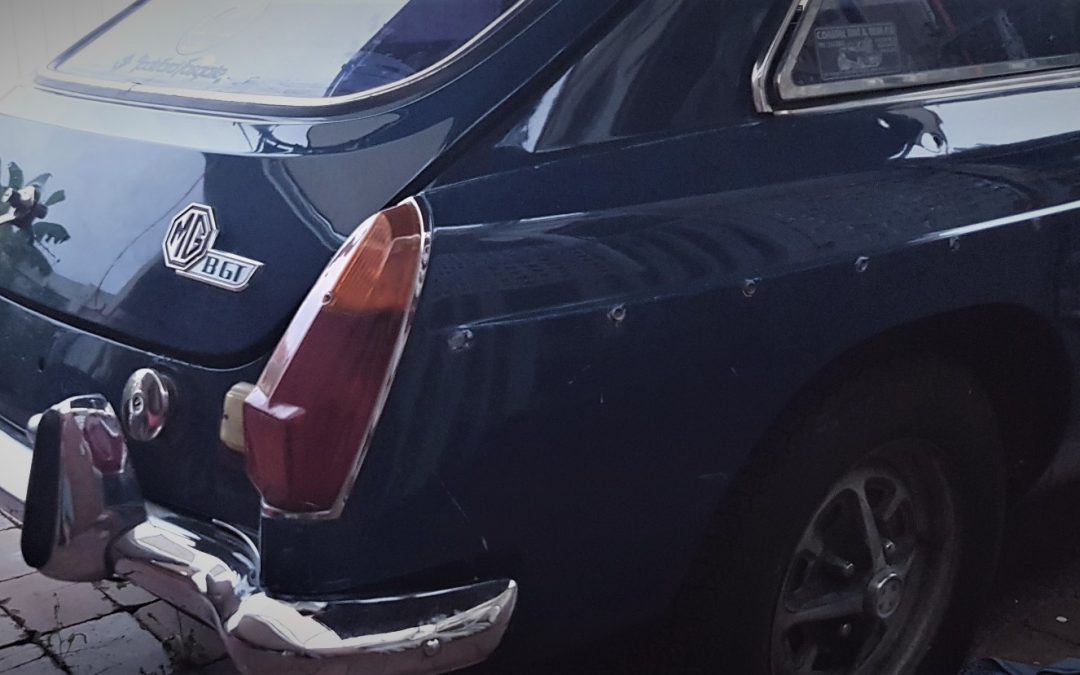
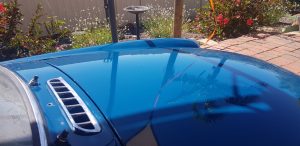
The decision to simply refurbish the car to keep its original patina meant working with the existing paint finish. The paint on the GT as I took custody of it was in a pretty shabby state. It had been stored for an unknown amount of time in an undercroft under a house that was closed at one end by a single garage door, and partially open at the other end which the sea breezes directly accessed to deposit its salt-laden air from the ocean just over a kilometre away. Besides being rough, there were signs of small surface rust beginning to settle in the paint finish.
Oxidation: There are four main culprits to paint oxidation.
1. UV rays produce heat, when that heat penetrates the paint and combines with oxygen it fades the paint.
2. Salt is sodium chloride which is corrosive and eats away at the paint till it reaches the bare metal and forms rust. Those little salt crystals are further activated by UV rays.
3. Pollution in its many forms settle on the paint and if left unattended, guess what, it fades paint. I lived and worked for quite a few years close to a large industrial area and pollution was constantly settling on the car’s paint. The car needed constant washing, and not only that, inside the house required constant dusting. When I moved to another area this was significantly less for both car and house.
4. Abrasives introduced in the cleaning process is a no go for paint. Examples of this is the local carwash, a grubby 4X4 leaves dirt in the brush which introduces abrasives to the next car that uses it. Or your old washcloths that have done years of service may well be due to be replaced. Perth Western Australia is built on a sand plain and those little gritty particles are everywhere, if I accidentally drop the cloth on the ground it is never used again on the car’s paint, I reach for a new cloth.
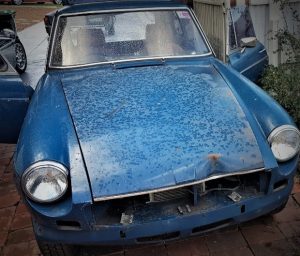
So back to the GT, the paint had suffered the effects of salt crystals eating through the paint, in some spots, it’s reached the metal. And although it’s been garaged for most of the last 17 years the paint was very rough, with little raised lumps like pimples on the surface, which I’m guessing is the salt working its way through, I’m sure if left there for a few years more it could have become a significant problem. Also, there is evidence the Teal Blue GT had a rough life before being taken off the road, there’s lots of red dust through the cracks and cranny’s, stone chips around the wheel arches and sills and numerous scratches as seen on a 4X4 where bushes scraping down the side has left scratches the length of the body.
Refurbish: Well the goal for this project is to refurbish what is there, so, ummm… it was decided to follow a 5 step process using a variable speed orbital polisher.

1. The 1st task was to hit the paint with some 2000 grit paper of the new high tech kind, made in Germany, it was perfect for the job at hand. The raised pimples in the finish and a few larger spots the size of a little fingernail were flattened out which exposed the light undercoat underneath. The 2000 grit took out many of the light scratches but the deeper ones I left there.
2. Next was a high tech 3000 grit with sponge backing. The paint really is quite rough and at this stage, it gave the paint a flat or satin finish look which looks ok and I contemplated sealing it up and leaving it there. It gave the curves and especially the front fender curves sweeping back from the headlights quite a vintage look, it’s interesting how a gloss finish smooths out and modernises these curves.
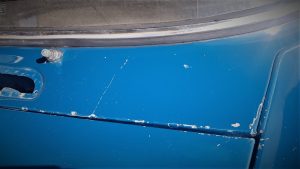
3. Next step was to hit it with some scratch and swirl compound using the foam sponge. At this stage, the paint started to feel flat and smooth and for the 1st time in at least 17 years and perhaps quite a few more the paint had some gloss to it again. Wherever the raised pimples were flattened out, the effect on the darker Teal Blue finish with some gloss on it is like the Milky Way of stars in the night sky. I guess I can always revisit the satin look and cut it all back again with the 3000 grit, it would go some way to disguise how rough the paintwork is.
4. Polish time. The sponge cleaned out and hit with some polishing compound restored the gloss levels again. In the spots where there were not many blemishes, it looks great. If the whole car looked like this that would be nice but that is not the case, there are a lot of blemishes but I really want to retain as much of the original patina as practically possible, who cares if when I pull up at the traffic lights the paint looks like a shiny dog’s breakfast.
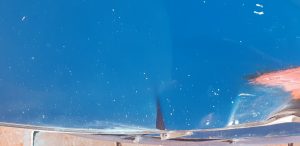
5. Yeah, nearly there, time to seal it up. The paint has some stains as well and seems to stain very easily so it is important to get it sealed up. To save regular waxing to seal it I opted for a longer-lasting ceramic sealer, supposedly it lasts 6-12 months, which is initially more expensive but in the long run, I think it saves both money and time. I must say, I do like the glossy look and the flat smooth feel running a hand over the finish, lovely.
So, other than a bonnet bump and the R/H fender suffering the results of a light nose dive, the plan is to get them sorted at a local body repair shop when the car is rolling again under its own steam, that is pretty much the paint part of the project done. A variable speed orbital polisher was used for the whole process, and a few rags, micro cloths and elbow grease for the tight spots the machine can’t reach. I used two 2000 grit discs and two 3000 grit discs, less than half a bottle of cut and swirl compound, lots less polish, not very much ceramic sealer, the elbow grease, and it took me about 6 days. The option to go down the path of restoring the car with expensive paintwork and a massive amount of time, well I’m happy with the results, I’d rather put the dollars saved into building a car that performs to my specifications, is reliable, and have the car as original as possible running on its own steam a lot sooner.
That’s pretty much a wrap on the paint. The precious Teal Blue Gt is looking a little more loved after being neglected for so long.
Happy MG trails…..
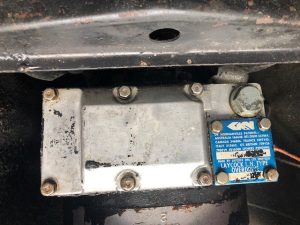 around the Laycock L.H. Style Overdrive unit. A quick online search revealed the overdrive unit shares oil with the gearbox. Accordingly, no top-up was required.
Recent Comments