by Terry Maynard | Dec 8, 2020 | Refurbish, Repair

To avoid doing this job at all, an alternative would be to buy an MGA, no window glass and its accompanying seals to deal with, otherwise, read on.
The door and window rubber on the GT was in a sorry state, hard and brittle. Time to be replaced, and If that rubber is shot, then so too will the channel rubber that the door glass slides up and down in. Order it at the same time, or if you don’t for whatever reason, (I thought mine were ok till I got a closer look), I got them from a local supplier, it is a very common type and is called “Bailey Channel”, there are 4 sizes, the MGB is the second smallest. It’s available in Australia from good old Clark Rubber, who stock over 100 different car rubbers and seals, otherwise another rubber and seal supplier, or wait another week for an order to arrive from the UK. And do order the gasket between the frame and trim piece. Also, get some non-curing mastic and new rivets from your hardware.
Here is a link to part 1 and part 2 of an excellent YouTube vid on how this is done, very handy. I followed this procedure with only 1 or 2 minor departures.
Part 1….. https://www.youtube.com/watch?v=KE-kIhL_0v8&t=617s
Part 2….. https://www.youtube.com/watch?v=buAh5rLwh74&t=1104s

Follow the steps in the vids, a departure will likely require going back a step to do it again? It is one of those jobs that is a slow and patient process. After completing one door the next will be a lot easier but it still takes time, for example, the quarter window glass is best held in place with its frame and new rubber with clamps overnight. The driver’s door was off the car so I did that one on the bench, the passenger door was done on the car and I found it much easier as the door was held in situ. I won’t describe the procedure step by step as the YouTube vid does that, but I’ll note key points to take notice of.
I soaked all the nuts and bolts in CRC a couple of days prior to starting the job. The 1st two bolts that come out allow the rear side window glass channel to be taken out. Paying attention to how this comes out will be handy for when it has to go back in, which will take some maneuvering to get it lined up and secured again.
I soaked all the nuts and bolts in CRC a couple of days prior to starting the job. The 1st two bolts that come out allow the rear side window glass channel to be taken out. Paying attention to how this comes out will be handy for when it has to go back in, which will take some maneuvering to get it lined up and secured again.
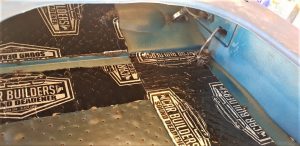
Take note how the 2 attaching points on the window glass rail slip out of its channel, it will be useful for when it goes back in. Fitting the glass back in the door that was still on the car just fell into place easily and was much easier than the door I did on the bench which required me having to hold the door as well as locate the channel. I didn’t replace the rubber in the window class channel, although it was old and brittle, it was not going to budge and come apart so I decided it was best left there. Grease up both rails on this channel before putting it back in.
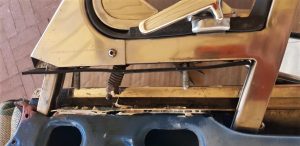
In the video, he didn’t take off the top trim piece that holds the window weather seal rubber which is secured to the door by rivets. This is one of my departures as I found it necessary to take this off for two reasons. Firstly the quarter window frame comes out a lot easier together with this piece, and secondly, the frame goes back on a lot easier with this trim piece held together. It’s because of the odd angle of the bolts and spring tensioner, if that trim is on the door the holes don’t line up when you try to marry the frame to it because of the angles, so hold that trim to the frame and marry these two pieces to the door and it will go back in smoothly. The bonus is you get to clean up the trim piece, polish up the duco under it, put a new bead of non-curing mastic between the door and the trim piece, the new gasket between the frame and trim piece and put it back with nice shiny new rivets. Yippie!
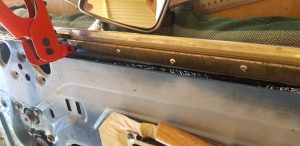
When you put in the new Bailey Channel, notice that the one taken out had a couple of spots of glue. Put a few dots of glue to hold the new Bailey Channel in place. Some months down the track the thought of this sliding down the channel and me having to open it all up again to fix it would not be a good outcome, no sir eeee, gluing it now is a good idea.
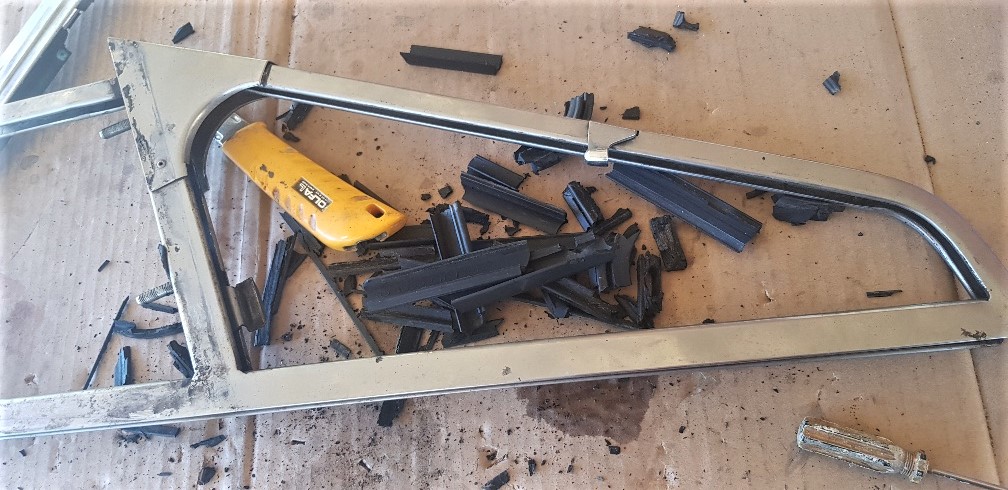
Quarter window rubber weather seal. It’s an ideal time to clean up and polish the frame. When fixing the new rubber, the use of dishwashing detergent readily available from the kitchen acts as a great lubricant to help the new rubber to slide and pop into place, starting at the top of the frame and working your way down. Job done, and it will be gratifying compared to the hard brittle stuff you took out.
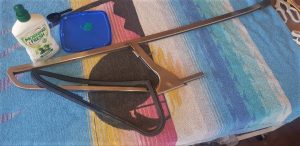
Gently pry apart and separate the quarter window glass from it’s 2 sided frame. Putting it back together I found it best to hold the frame in a vice, try to put the new rubber in the channel and hold it in place as best as you can with pegs or small clamps. Doing the second door I discovered it was easier to firstly jam in the little semicircular chrome piece into its corner, holding it in place so it doesn’t slip out, and slowly marry the glass to all this. Be mindful of the length of rubber, keep trying to stretch it out as you go so it won’t come up short, all the time using the dishwashing detergent as a lubricant. The glass will want to keep sliding and popping it’s way back out, keep working it in and down, when it gets closer to where it needs to be, apply some clamps to press it all the way in. Once it is all the way in I found it best to leave it clamped overnight. The next morning the excess rubber can be trimmed with a sharp blade. Tighten the spring bolt that puts tension on the glass within its frame so it will stay open when driving along and not blow shut.

While the door was free of its burdensome parts it is a good opportunity to give it all a thorough clean up inside and out. Some degreaser for greasy parts and orange-based cleaner gets it done. I hit a couple of small surface rust spots with a rust treatment, primed with red oxide, undercoated and touched up the paint with a spray can that was prepared by my local automotive paint store. I took the opportunity to also apply some additional sound deadening, surface cleaned with isopropyl so the self-adhesive strips stick well.
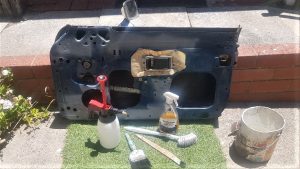
The door glass weatherstrip. A light spray with CRC gives it some slip, gently tap the little spring clips off, I used a jeweller’s screwdriver and a small tack hammer then grabbed with needle-nose pliers.
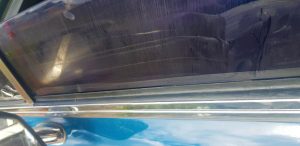
Put the new weatherstrip on after putting the frame back in but before the glass goes in to trim and align it properly. Putting those little spring clips back on is fiddly, the combination of holding the clip with needle-nose pliers, twisting a flat blade screwdriver to gently get the clip started, and finally, multi-grip pliers to bed it into its right place. Use more dishwashing detergent to lubricate the new weatherstrip so the window glass going up and down as you test it won’t grab.
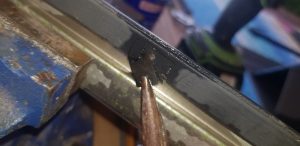
Putting it all back together I put a dab of copper grease on all the nuts and bolts to make it easier in the event that someone else does this job 40 or 50 years down the track. Ummm, maybe that’s not likely, but who knows.

Take the time to oil up the window winding mechanism, all the joints and grease the cog behind the window winding handle inside. And I hope you ordered the top rubber trim that crowns the window glass and frame in all its glory, now is a good time to fit it. (See top picture.)
Happy door window glass rubber and seal replacements(:
by Terry Maynard | Dec 8, 2020 | Carburettors, Refurbish, Repair
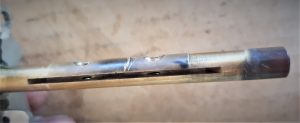
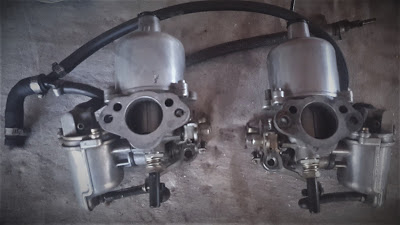
With thanks and credit to Mark for contributing this information, symptoms, diagnosis and solution to fix an air leak around a worn throttle shaft on an SU carburettor.
Those who have been around classic cars and SU carburettors would be familiar with this issue and may have wondered why SU did very little to correct this known problem in their carburettors. Maybe being relatively new to classic SU equipped cars this is a recent development with your own car?

Symptoms:
Attempts to balance the carbs when they appear to be well balanced only to go completely out of balance at the touch of the throttle. Missing, stalling and running rough at idle and driving, or stalling and the car won’t start again.
Diagnose:
With a can of carb cleaner, while the car is idling, spray around the area of the suspected shaft. If an air leak exists the carb cleaner will get sucked into the intake manifold and the car will stall. Problem diagnosed.
The fix:
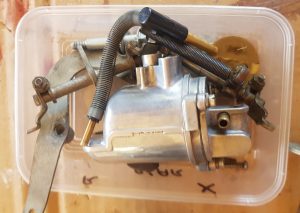
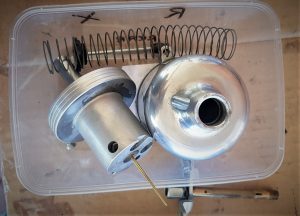
Offending carb off the car, it is disassembled and rebuilt involving new oversize bushings, shaft, butterfly valve, seals, gaskets, and the locating holes for the throttle shaft are reamed, a specific glue is applied to the new bushes, it also is an ideal time to clean, inspect and rebuild the carburettor or multiples if that is the case.
We read about clever people with well-equipped home workshops. They have time on their hands and either knowledge or insatiable desire to get in learn. Furthermore, for the budget-conscious home mechanic, there are savings to be had by learning how to do it yourself.
Alternatively, classic car owners that don’t fit into the above category are left with the option to get someone to do it for them. Car or carbs get delivered to the repair shop and, many dollars later they are refurbished, put back on the car and working as expected, along with a hefty invoice for the privilege.
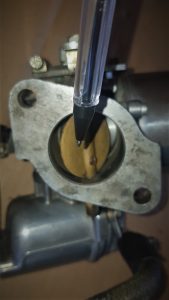
An alternative solution:
This information is the journey Mark embarked on in the pursuit to fix this problem on his own MGB. Additionally, with limited time, tools and technical know-how to rebuild his carbs at home Mark was working to a budget. A “Wanted” listing in our local MGCC chapter yielded a second-hand set of SU’s from me. However, there was some play in the throttle shaft, and we talked about the risk of inheriting the same problem.
Actual Solution:
As it turned out after getting his purchase home, inspection revealed that the shaft on this set was worn as well. All was not lost though as the set he got from me were in much better overall condition so further research led him to bite the bullet on attempting a rebuild at home. A visit to an SU repair specialist revealed he didn’t have the tools and skill to hone the body to accept the new shafts or the specific glue to secure the new bushings. The shop offered their services for this part of the job so the correct rebuild kit was sourced, SU H4 AUD325F and R (the F is for Front carb, R would be for rear), identified on the little metal tag usually located on the float chamber. The AUD number identifies the specific model with its unique modifications. As I understand, the many variations usually related to emissions control changes at the time that the MG factory was having to keep abreast of.

Finished job:
The carbs are on the car and running now. Marks original solution was to save time and money buying a set of second-hand carbs. In conclusion, his fix was to rebuild these carbs anyway. His attitude to buying into the second set of carbs with the same problem was to say, “it is what it is”. His search for a solution leads him down a path that yielded him a better overall set of carbs and taught him a new set of skills. It sounds like a win-win to me. Consequently, Mark is better equipped to maintain his own car. He’s very happy with the result.
Happy trails MGer’s….
by David Maynard | Dec 7, 2020 | Review
Related Posts ==> Other MG Reviews
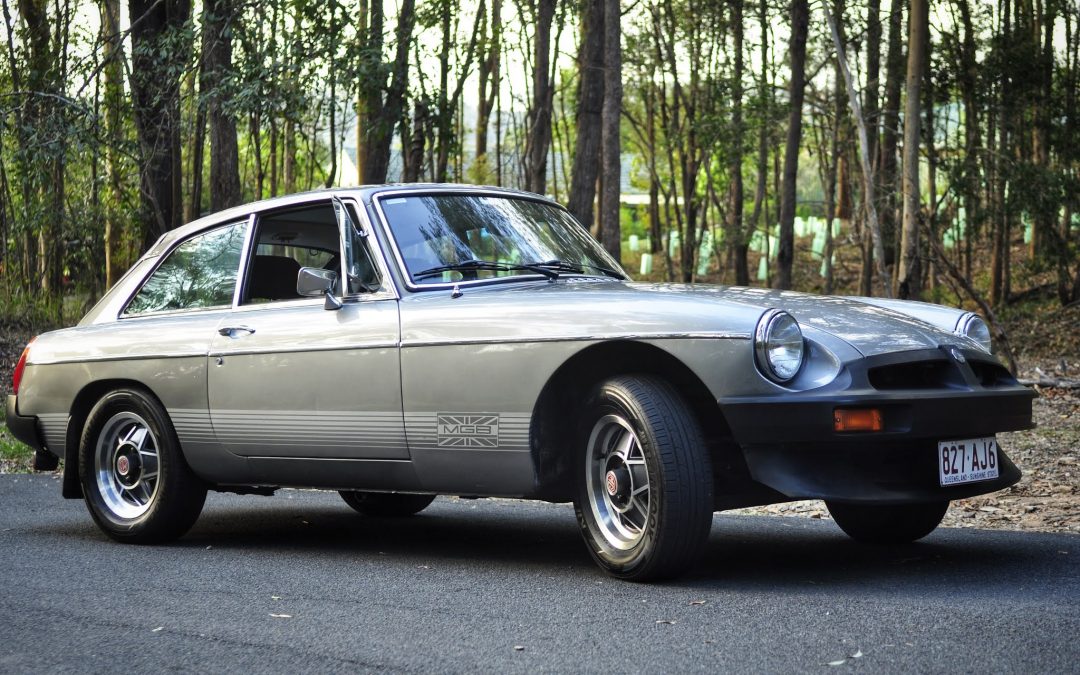
When I first started looking for an MGB, I had already decided I would be buying a GT model. In Queensland, where we have long, hot summers, it seemed to make more sense than a roadster. As luck would have it, and all the factors that come together when we make these choices, I settled on a 1980 MGB GT LE (Limited Edition), UK model.
It was a long-distance purchase that required transporting the LE from Melbourne via road freight. The transport worked out very well, and I discovered that people buy, sell and ship cars all over Australia. It’s common practice.
Cool Factor:
The MGB GT LE UK edition was a good purchase, if only for the “James Bond” factor that unexpectedly accompanied it. It seems the car has some resemblance to the silver Aston Martin DB5 that triggers memories of Sean Connery in Goldfinger. A comment I received recently was, “You must be James Bond!” So this LE model has lots of cool factors going on…thanks to Carrozzeria Pininfarina for the ‘fast back’ styling.
Cosmetic Condition:
Buying a classic car sight unseen from another state can be fraught with disappointment, but the LE came to me in excellent condition. I organised an independent pre-purchase inspection that resulted in an excellent report. However, there were a couple of items the pre-purchase inspection missed.
This MGB GT has received a respray at some point. Hence, the finish is in very nice condition… There is no rust. External trim, including the bumpers and factory fitted spoiler also found on the American “Limited Edition” models, is in excellent condition and very little pitting to the brightwork.
The cast alloy rims fitted to all of the GT LE cars produced, are the same rims fitted on the American “Limited Edition’ cars and believed to have been sourced from British Leyland’s store of rims for the Triumph Stag. They are in excellent condition, which according to receipts that came with the car were refurbished a few years ago – and they look it too.
The original GT LE silver and grey interior trim and cloth seats are in excellent condition. Likewise are the black carpets that may have been replaced. If they have been replaced, it would have been some time ago as there are some rub and ware patches in the usual spots but nothing that requires replacement. Most of the switches and knobs work as they should, including the funky centre console-mounted interior compartment lamp.
Driving:
Many years have passed since driving an old school car like the MGB, which, by the way, is a very different experience from driving a modern car. In the ’60s and ’70s, it was normal to drive a car with no air-conditioning, no power steering, distributor and points with a condenser that needed replacing or adjustment at 3-month intervals, carburettors that need tuning, in the case of the MGB twin SU’s that also needed to be balanced, wiring systems with inherent limitations, old suspension, no keyless entry, etc.
We’re talking “old school” driving here – you have to use the choke to start it and let it; you have actually to steer it through corners, you have to use some muscle to maneuver it in and out of car parking bays, you have to give the brake pedal that extra bit of pressure, use your gears to slow down, you have to use the quarter windows to get airflow to the interior, you have to use your key and walk around the car to unlock doors and hatches. You don’t expect explosive performance from a standing start with the factory 90 Hp (67 Kw in modern speak). But, it is still a great driving experience.
What these cars are made for is a gentle drive around town or over country roads. Being close to the road gives the feeling of speed without necessarily going fast and handles the bends with ease whilst feeling very secure. It has a button on top of the gear knob to electronically switch into overdrive without operating the clutch or changing gears. There is plenty of legroom too. I am relatively tall (185 cm or 6ft), and the seat is approximately 3/4 of the way back. Getting into the car is certainly not as easy as my big SUV, but it is not too difficult. It has a 15-inch steering wheel which does make contact with my thigh.
One of the surprising things I found driving this car is the lowish internal noise levels whilst driving. Even with the windows down, my wife and I can have a conversation quite easily whilst driving. I expected the internal noise level to be louder. I was also surprised at the effortless way it cruises down the freeway with the overdrive switched on. It is a cool and enjoyable driving experience.
Interior Space:
The interior space is surprising. The MGB GT looks very narrow, more so than I remembered from the ’70s, yet I am also surprised at how much internal space there actually is. It feels very comfortable with two adults in the car, and I don’t feel cramped or claustrophobic. In the case of the GT, the fastback styling provides quite a lot of space in the rear hatch area, which I think adds to the sense of spaciousness.
The legroom is excellent, and the foot pedals are spaced well enough to operate comfortably, even with my larger dress style work shoes. However, wearing a pair of large safety boots might present a challenge. Seat adjustment is adequate, both forward/back and tilting the backrest.
The original steering wheel is 15in, and there is no adjustment for the steering column.
The dashboard area is old school and cool – (right to left): Temperature gauge; Tachometer; Fuel gauge; Speedometer; Oil Pressure gauge; Hi-beam indicator light; Charge indicator light plus Dash light brightness control. In my normal driving position, my right-hand blocks the temperature gauge view, so to check that, I need to lean forward a little. The passenger side has a reasonable glove box in size for a small car and works well. Under the glove box are the bonnet release lever, a lever to open/close the air vent, and a small compartment in the footwell area that would easily hold a street directory plus more.
The middle console – (top to bottom) – Various switches for the fan, internal lamp, and hazard lights; Cigarette lighter, Internal Lamp, Choke Leaver; Radio; Fan Temperature Control, Clock (unique to the LE), and Air Fan Control Knob; console platform surrounding the gear leaver, ashtray and a console compartment that is small and narrow but somewhat functional. The hand brake lever is attached to the tunnel, but it does rub against my thigh whilst driving.
The rear seat is not functional for passengers to today’s standards and does not have seat belts. This area would be very suitable for storing handbags and similar-sized items. A medium-sized dog would fit there quite easily. My brother has researched fitting an air conditioner in his GT and was advised this area could house the internal condenser unit with some creativity. So this area is quite functional.
The rear hatch area is very nice. Not large but quite adequate to transport shopping, picnic supplies, or even a swag and associated
camping gear for an overnight camping trip, or luggage for an overnight glamping trip if that is more your style.
Seat Belts – being a 1980 model car, the LE had factory-fitted inertia-style seat belts with the fixed latch anchored at the base of the tunnel. In my case, both of those seat belt units have been replaced. One of those, the driver’s side, was replaced recently by me.
Related Posts ==> Seat Belt Replacement
Given the size of the car, I find the internal space surprisingly adequate for normal daily use.
Performance:
A standard MGB is by no means a performance car. A lot of the technology is old, even beyond the car’s age, with the B series engine having its origins in 1947 with a few different versions – 1200cc, 1500cc, and 1600cc used in the MGA’s, and the MGB’s 1800 cc engine. My wife’s car is a standard 2016 Toyota Corolla 1800 cc engine which is a zip machine – it just zips everywhere and quickly. No comparison with a stock standard MGB.
Some people carry out various engine performance upgrades. Fitting a supercharger is a popular option that does increase the performance quite a lot. My understanding of a supercharged MGB is the added torque makes low-speed driving in traffic and the suburbs very friendly with fewer gear changes, and highway driving is much more spirited and fun.
This LE came with the original twin SU carburettors, and aftermarket extractors were fitted on the car when I got it, with standard size exhaust and muffler.
Gear Box:
The MGB is a 4-speed manual. This LE has full synchromesh and overdrive gearbox. The overdrive switch located at the top of the gear knob was used on earlier Triumph cars for some years. The LE overdrive operates in 3rd and 4th, standard on all RHD cars from 1976. On North American cars from 1977, it operated only on top gear.
Operating the clutch in my LE is very smooth – a lot smoother than I can recall in any other manual cars I have driven. The gearbox is quite close and notchy and works very well. Given the reverse position, which is down and to the left, the first couple of times I drove the car when changing from 1st to 2nd, I maneuvered the gear stick too close to reverse, which responded with the usual protest. I very quickly made the appropriate adjustment and no longer having any trouble with that change.
The overdrive, a Laycock LH type, works very well and drops the revs by approximately 4000 rpm, making a big difference on the highway and even around back streets. It makes for a more comfortable ride.
Braking:
Brakes on the MGB GT LE are period standard – disk brakes at the front (no brake boosting system), drum brakes at the rear, and a hand brake lever that operates in the normal way with a button release. Before purchasing the LE, I read a review on old car braking systems. In many cases, the conclusion was that the issue many drivers are concerned about is often the “feel” of the brakes compared to a modern car. Once you get used to that feeling, the brakes are adequate for a standard MGB. Keeping that in mind, when I had some test drives, I very much agree with the concept of “feel” – you might need to give the pedal a bit more of a squeeze, and that’s where the feel comes in. However, the brakes work fine. I notice the difference more when I jump back into my modern SUV, where at first I tend to stab at the brakes.
I also recall from my driving experiences of the ’70s that I quickly got in the habit of using the gears to assist with slowing down – truth be told, as a 17/18-year-old in the 70’s my driving style was a bit more radical than it is now.
Upkeep:
Keep in mind that a 40 plus-year-old car is a classic car, and they do need care, time, money, and periodic repairs as they arise. Many old classic cars are club cars and don’t clock up a lot of miles, so the upkeep is reasonable provided it is done regularly. I was also a little surprised at the low cost of insurance on my LE, so make sure you have appropriate insurance.
Potential Upgrades:
Many upgrades can be carried out on old classic cars. We have a post that provides
more details on this topic, but here is a brief list of ideas:
Electronic Ignition
Brake booster upgrade
Disk brakes rear
Gearbox upgrade to 5 speed
Supercharger for that little extra performance
Air conditioning
Suspension upgrades
Bumper/valance upgrades
Extractors and sports exhaust
15in steering wheel
15in wheels and lower profile tyres
Wiring looms
Electric window
Central locking
Engine cooling system
And much more
That’s a Wrap:
So that’s a wrap-up on a brief review of owning an MGB GT LE. This particular car is in very nice original cosmetic and mechanical condition. It drives very well and, for a car from this era, it drives better than expected. It also gets attention when I’m out and about in it.
The one thing the GT LE has over all the other MGB’s – it has that unique James Bond factor, courtesy of the Pewter Metallic silver, resembling the Aston Martin DB5 in Goldfinger – “You must be James Bond!”
So there it is – shaken, not stirred.
Happy trails.
by David Maynard | Dec 7, 2020 | Repair, Upgrade
Related posts ==> Other Repairs

Broken Seatbelt
My MGB GT LE is a 1980 model and over 40 years old.
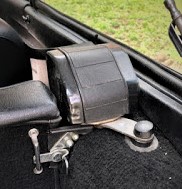
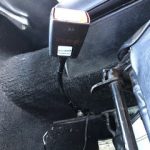
The plastic cover over the original driver’s side seat belt latch broke recently, resulting in the release button falling out and the seat belt latch no longer able to clip together with the buckle.
Buying Tips
There were no inertia seat belt parts available from the regular MG parts suppliers looking online in Australia. I also checked the local auto parts stores, and no luck. I then found a local seat belt supplier company that could supply a suitable inertia-type replacement seat belt unit. The new unit was supplied with the seat belt unit, mounting plate, sleeve washer, bolts, and spring washers.
Following is a summary of buying tips:
- The online search offered two seat belts – a simple lap strap and latch unit or a lap/sash inertia unit. Given the year of production (1980), my MGB GT had factory-fitted inertia units.
- After looking closer, the passenger side seat belt unit was aftermarket, and the driver side unit was the original factory fitted unit.
Installing Tips
Following are some installation tips:
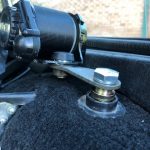
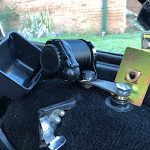
- The mounting plate – Installing the after-market unit was fairly simple but offered a couple of small challenges. The first being the mounting plate. The original mounting plate/metal bar was shaped to maintain a level release spool for the strap to release when pulled, which will not actually release if not relatively level. I first fitted the spool unit with the flat metal mounting plate supplied with the new unit. Given the mounting nut’s position, which is slightly to the rear and the side from the top of the wheel arch, the spool unit was not level, and the belt did not release. I then noticed the original mounting plate had a slight twist, allowing the spool unit to sit relatively level. I re-installed the spool unit with the original mounting plate, and all work properly.
- The second challenge was the wiring on the original latch component that sends a signal to the SEAT BELT warning light on the console of my 1980model MGB. I decided to cut the wires and leave them unconnected, making the SEAT BELT warning light inactive.
- The original spring washers seemed to have less spring than the new spring washers supplied with the new unit, so I replaced the old with the new.
- A couple of the new bolts were a little long, so I used the original bolts. I also used the sleeve washer to mount the new spool unit on the wheel arch, lifting it slightly higher.
- The new spool unit was supplied with a hard plastic cover that does not clip anywhere and moves around. I plan to cut that cover off.
Summary
The new seat belt installation was fairly quick and simple and would have been quicker if I used the original mounting plate the first time around (see photo). The new unit works well, and the car is now ready to obtain a Road Worth Certificate for registration.
by David Maynard | Dec 6, 2020 | Repair
Related posts ==> Other Repairs
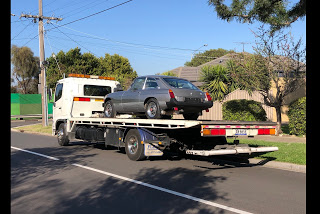
After purchasing a MGB GT LE interstate I was looking forward to picking it up from the transport yard. It was at this point that a problem with the car had been revealed. The car was difficult to start and when it did, it would only travel about 2 km before stopping. Regretfully, the car coming home unceremoniously on the back of a tilt tray truck.
After getting the car home the alternator and voltage regulator were checked. Both were ok.
A local auto electrician identified the fault as a burnt-out ignition relay, which, in an MGB, also controls the blinkers and some dash gauges, causing issues with those components..
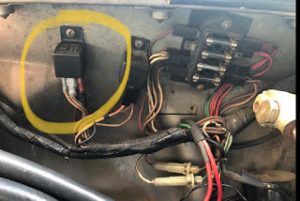
The replacement part cost $5.00 but caused a lot of grief and some unexpected costs including a new battery, tow truck and a fairly large invoice from the auto electrician. I checked the symptoms of a faulty ignition relay which described almost exactly what the car was doing.
Symptoms of a faulty ignition relay include:
- The car suddenly stalls while operating – yes
- Car not starting – yes
- Dead battery – yes
- Intermittent issues starting the car – yes
- Starter stays on after engine started – no
- Clicking sound coming from the starter – yes
If your MGB displays any of these symptoms then check your ignition relay. The issue of the blinkers failing and dash lights coming on were caused by some of that wiring in my MGB also passing through the ignition relay.
RECOMMENDATION:
Search online for symptoms and how to resolve them. If I had known what the cause was I could have saved a lot of grief AND money.


Recent Comments